{ Putty, SSH, Firefox SOCK Proxy }
| Section 0: Background Information |
- Tunnel HTTP traffic using Putty and Firefox SOCKS Proxy
- May be you are at a coffee shop and want to check your bank account on an open network.
- In either case, you can create a SSH tunnel using Putty between your PC and external server outside the network you are currently on. Then you can point your Firefox SOCKS Proxy to direct all traffic using the SSH Tunnel.
- Lab Notes
- In this lab we will do the following:
- Create and Configure a Putty SSH Tunnel
- Configure Firefox SOCK Proxy
- Test
- Legal Disclaimer
- Bài lab dùng cho môi trường học tập
| Section 1: Power On Virtual Win WX / Win 7 / Or Win 2k3 |
- Edit Virtual Machine Settings
- Instructions:
- Click on PENTEST-WXP
- PENTEST-WXP is a Windows Virtual Machine.
- Click on Edit virtual machine
-
- Configure Network Adapter
- Instructions:
- Select Network Adapter
- Click the radio button "Bridged: Connected directly to the physical network."
- Click the Okay button
-
- Start PENTEST-WXP
- Instructions:
- Click on PENTEST-WXP
- Click on Play virtual machine
-
- Send Ctrl+Alt+Del
- Instructions:
- Virtual Machine --> Send Ctrl+Alt+Del
- Logging into PENTEST-WXP.
- Instructions:
- Username: administrator
- Password: Provide the Password
- Open a Command Prompt
- Instructions:
- Start --> All Programs --> Accessories --> Command Prompt
- Obtain PENTEST-WXP's IP Address
- Instructions:
- ipconfig
- Note(FYI):
- In my case, PENTEST-WXP's IP Address is 192.168.1.111.
- Your IP Address will be different.
| Section 2: Power On BackTrack |
- Start Up VMWare Player
- Instructions:
- Click the Start Button
- Type Vmplayer in the search box
- Click on Vmplayer
-
- Open a Virtual Machine
- Instructions:
- Click on Open a Virtual Machine
-
- Open the BackTrack5R1 VM
- Instructions:
- Navigate to where the BackTrack5R1 VM is located
- Click on on the BackTrack5R1 VM
- Click on the Open Button
-
- Edit the BackTrack5R1 VM
- Instructions:
- Select BackTrack5R1 VM
- Click Edit virtual machine settings
-
- Edit Virtual Machine Settings
- Instructions:
- Click on Network Adapter
- Click on the Bridged Radio button
- Click on the OK Button
- Play the BackTrack5R1 VM
- Instructions:
- Click on the BackTrack5R1 VM
- Click on Play virtual machine
-
- Login to BackTrack
- Instructions:
- Login: root
- Password: toor or <whatever you changed it to>.
-
- Bring up the GNOME
- Instructions:
- Type startx
-
| Section 3: Bring up a console terminal |
- Start up a terminal window
- Instructions:
- Click on the Terminal Window
- Obtain the IP Address
- Instructions:
- ifconfig -a
- Note(FYI):
- My IP address 192.168.1.111.
- In your case, it will probably be different.
| Section 4: Start the SSH Server |
- Start Up Putty
- Note(FYI):
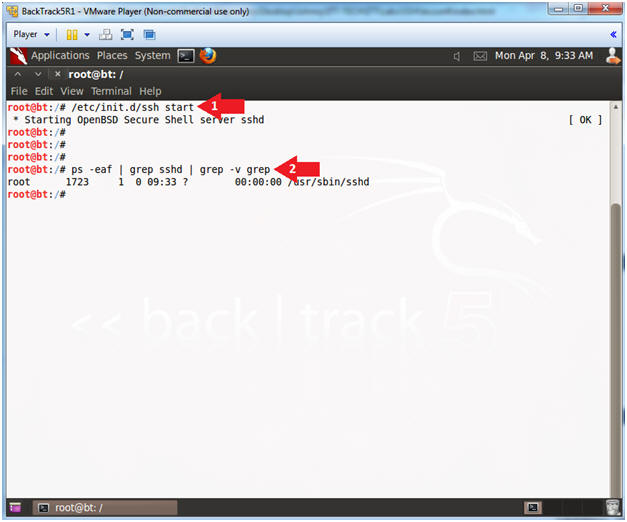
- If SSHD does not start, follow the below directions.
- BackTrack: Lesson 8: Configuring the SSH Server
- Instructions:
- /etc/init.d/ssh start
- ps -eaf | grep sshd | grep -v grep
| Section 5: Create Putty Tunnel |
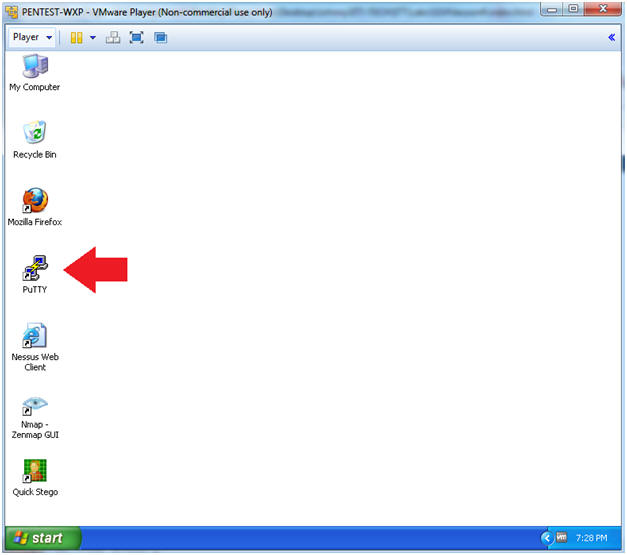
- Start Up Putty
- Instructions:
- Click on Putty
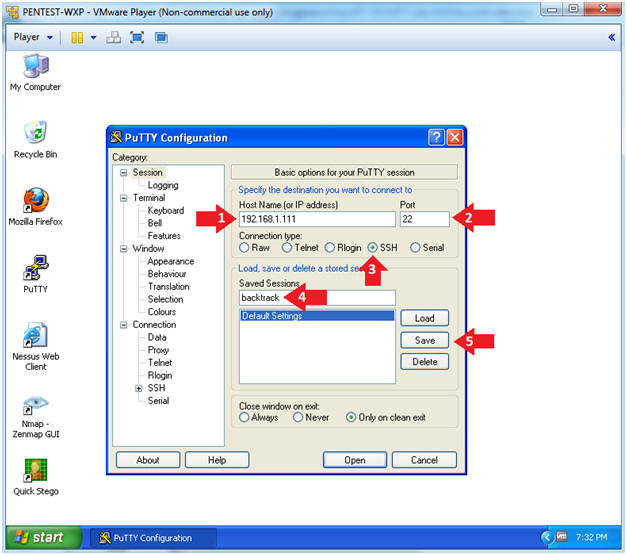
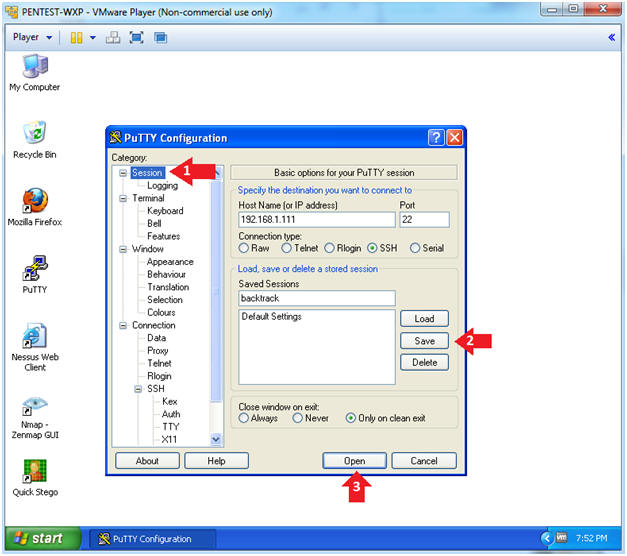
- Putty Basic Configuration
- Note(FYI):
- Replace 192.168.1.111 with BackTrack's IP Address obtained from (Section 3, Step 2).
- Instructions:
- Host Name: 192.168.1.111
- Port: 22
- Connection type: SSH
- Saved Sessions: backtrack
- Click the Save Button
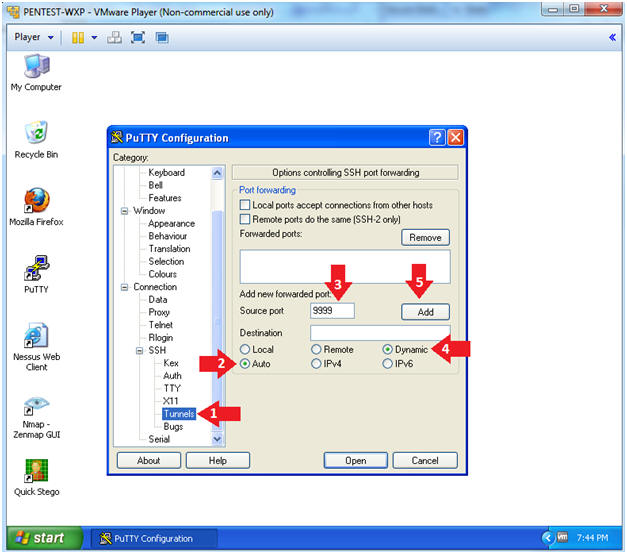
- Tunnel Configuration
- Instructions:
- Click on Connection --> SSH --> Tunnels
- Click on the Auto Radio Button
- Source port: 9999
- Click on the Dynamic Radio Button
- Click on the Add Button
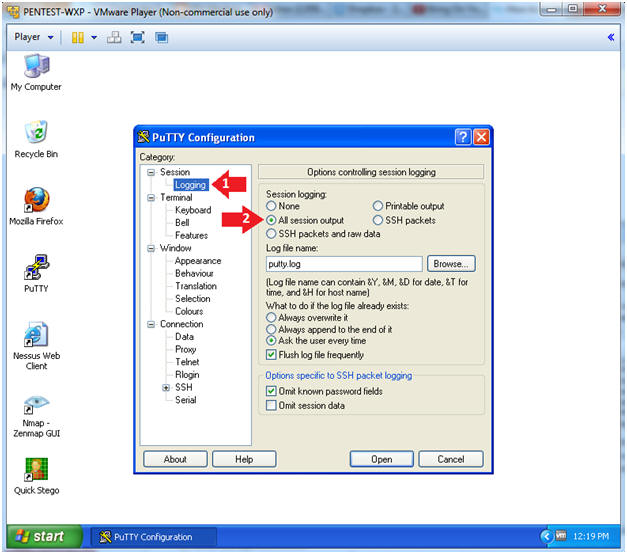
- Enable Logging
- Instructions:
- Click on Session --> Logging
- Session Logging: Click on the radio button "All session output"
- Open Session
- Instructions:
- Click on Session
- Click the Save Button
- Click the Open Button
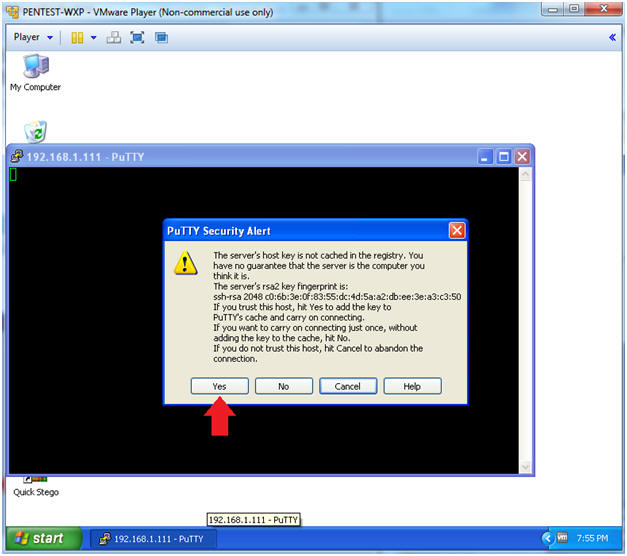
- Putty Security Alert
- Instructions:
- Click the Yes Button
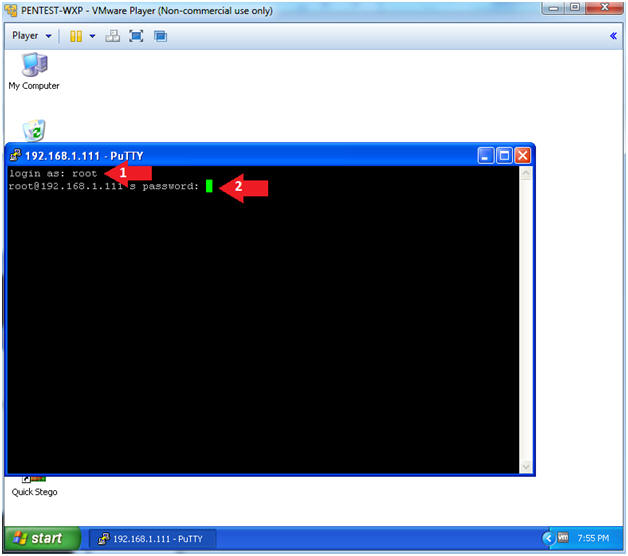
- Login to BackTrack
- Instructions:
- Login: root
- Password: <Supply Password>
| Section 5: Configure Firefox Proxy Settings |
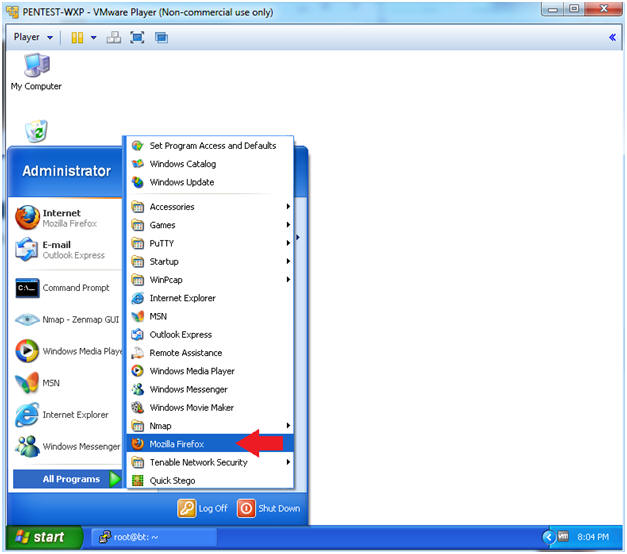
- Open Firefox
- Instructions:
- Start --> All Programs --> Mozilla Firefox
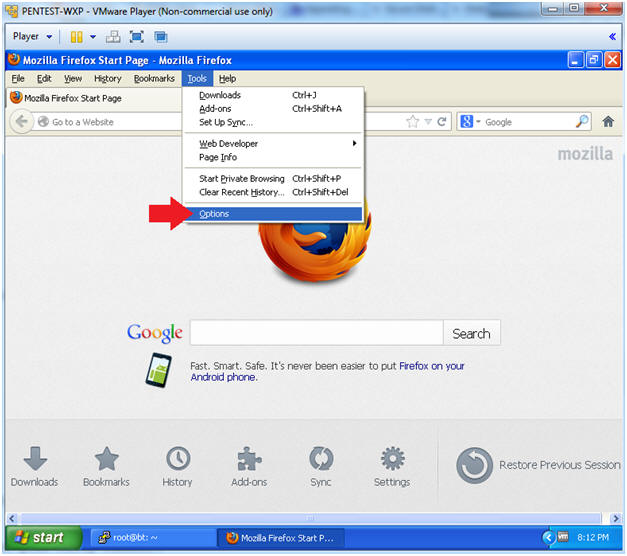
- Open Options
- Instructions:
- Tools --> Options
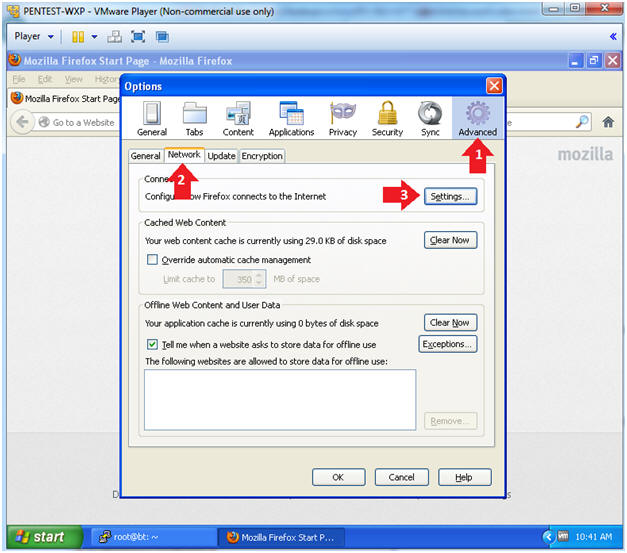
- Configure how Firefox connects to the Internet
- Instructions:
- Click Advanced
- Click the Network Tab
- Click the Settings button
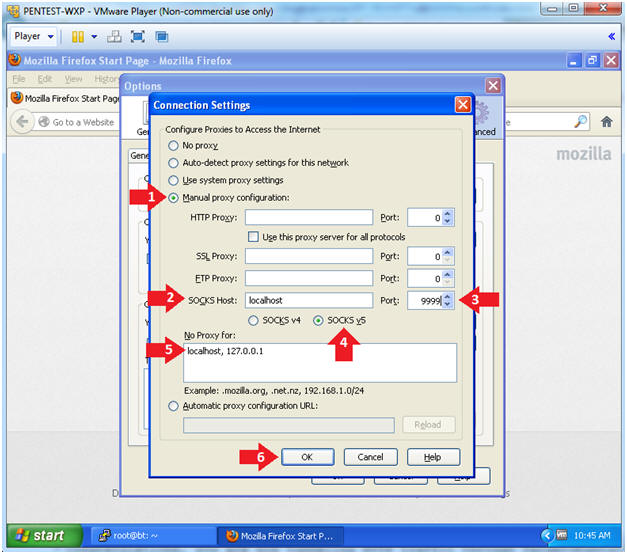
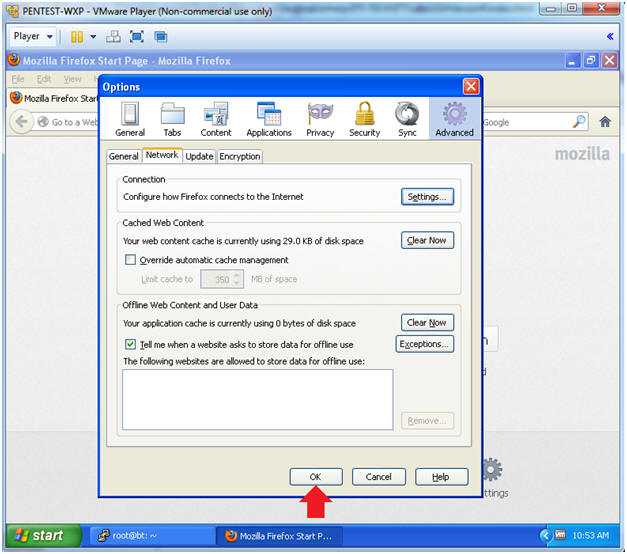
- Configure Firefox Proxy Settings
- Instructions:
- Click the radio button "Manual proxy configuration:"
- SOCKS Host: "localhost"
- Port: "9999"
- Click on the radio button "SOCKS v5"
- No Proxy for: "localhost, 127.0.0.1"
- Click the OK button
- Close Out Options
- Instructions:
- Click the OK button
| Section 6: Test Proxy Tunnel |
- Test Proxy Tunnel
- Instructions:
- Place the URL (facebook, youtube, etc) in the Address Textbox
- I used http://www.cnn.com

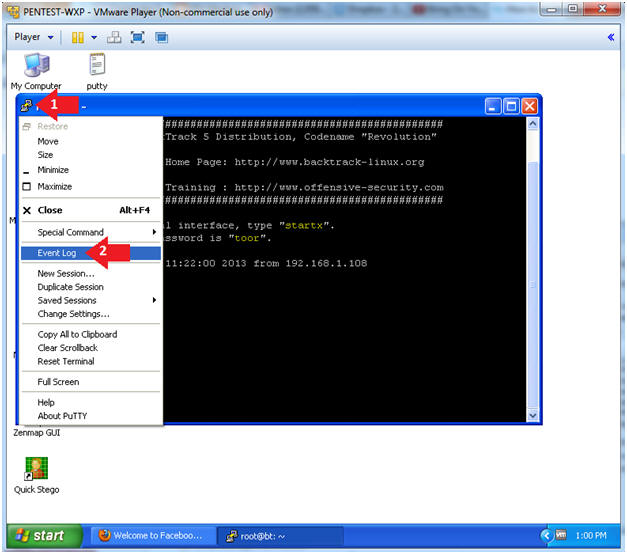
| Section 7: View Putty Log |
- Open Event Log
- Instructions:
- Click on the Putty Icon
- Click on Event Log
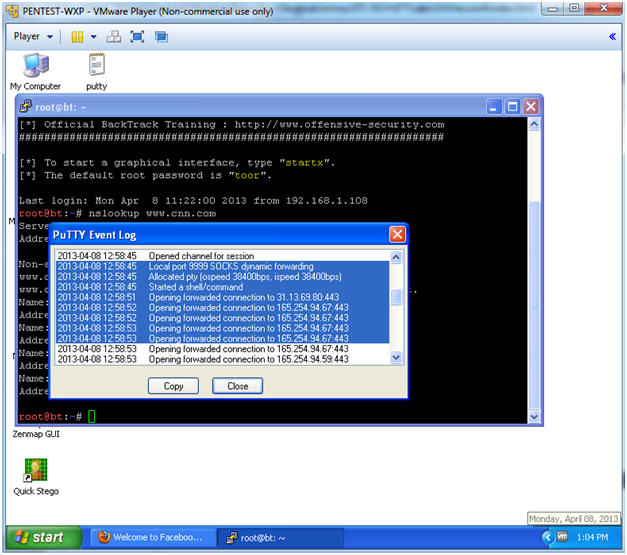
- View the Event Log
- Instructions:
- Scroll through the event log from top to bottom. You will see how Firefox forward its traffic through the SSH tunnel over port 9999.
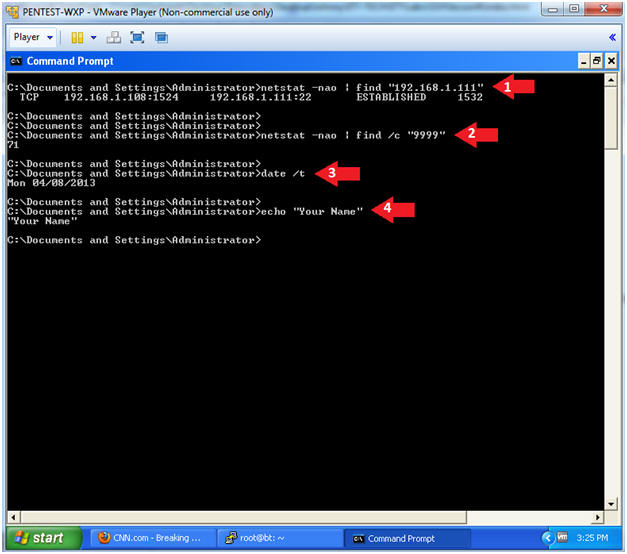
| Section 8: Bring up a console terminal |
- Proof of Lab
- Instructions:
- netstat -nao | find "192.168.1.108"
- Replace 192.168.1.108 with BackTrack's IP Address obtain from (Section x, Step y).
- netstat -nao | find /c "9999"
- date
- echo "Your Name"
- This should be your actual name.
- e.g., echo "John Gray"
- Proof of Lab Instructions:
- Do a PrtScn
- Paste into a word document
- Upload to website www.antoanthongtin.edu.vn
Không có nhận xét nào:
Đăng nhận xét