{ Configuring the SSH Server }
| 0. Background Information |
- What is SSH?
- Secure Shell (SSH) is a cryptographic network protocol for secure data communication, remote shell services or command execution and other secure network services between two networked computers that connects, via a secure channel over an insecure network, a server and a client (running SSH server and SSH client programs, respectively).
- Pre-Requisite
- BackTrack: Lesson 1: Installing BackTrack 5
- Lab Notes
- In this lab we will do the following:
- Configure the SSH Server
- Start Up the SSH Server
- Legal Disclaimer - bài lab dùng cho mục đích học tập
- Start Up VMWare Player
- Instructions:
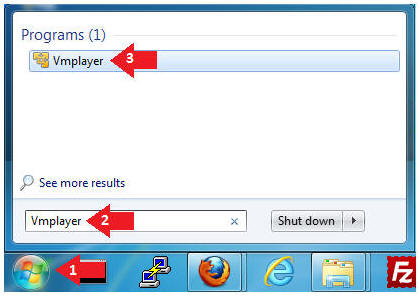
- Click the Start Button
- Type Vmplayer in the search box
- Click on Vmplayer
-
- Open a Virtual Machine
- Instructions:
- Click on Open a Virtual Machine
-

- Open the BackTrack5R1 VM
- Instructions:
- Navigate to where the BackTrack5R1 VM is located
- Click on on the BackTrack5R1 VM
- Click on the Open Button
-

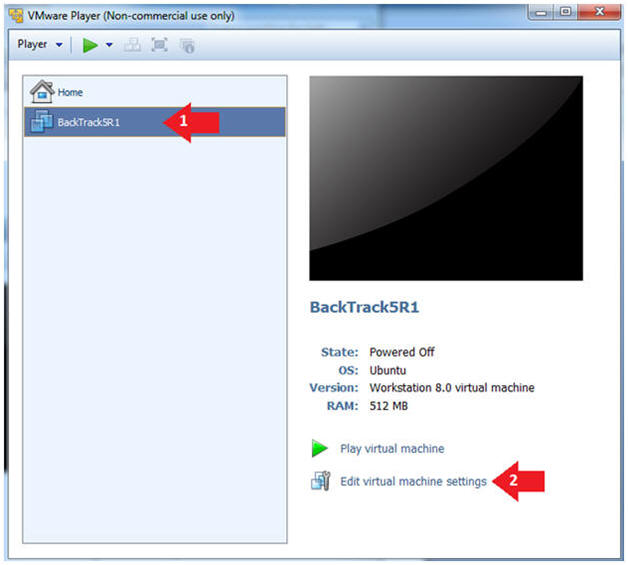
- Edit the BackTrack5R1 VM
- Instructions:
- Select BackTrack5R1 VM
- Click Edit virtual machine settings
-
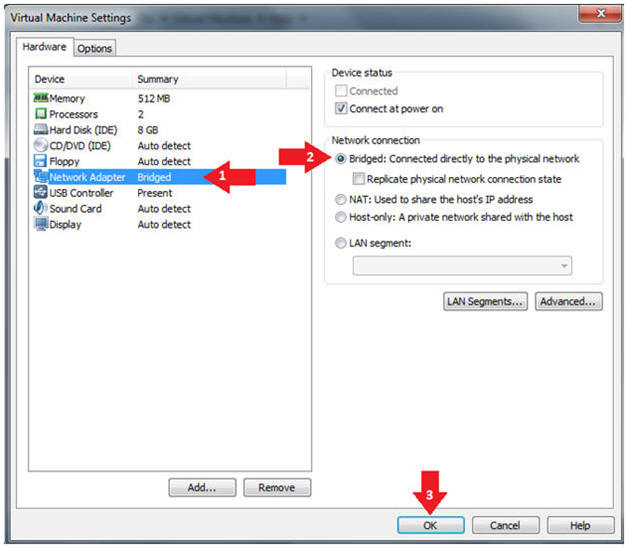
- Edit Virtual Machine Settings
- Instructions:
- Click on Network Adapter
- Click on the Bridged Radio button
- Click on the OK Button
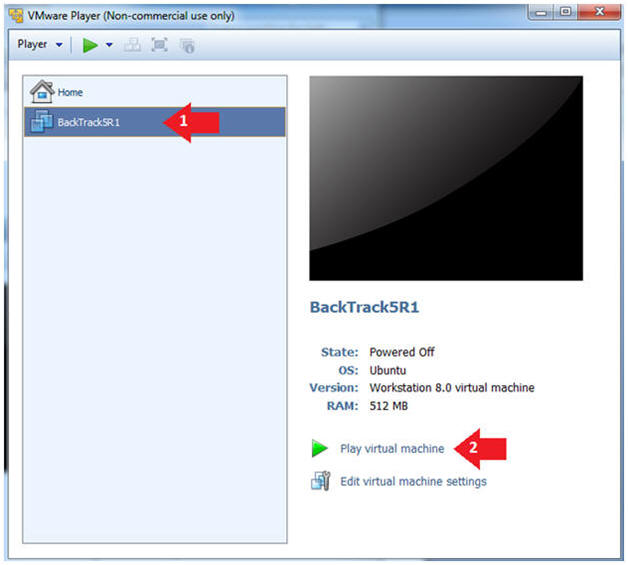
- Play the BackTrack5R1 VM
- Instructions:
- Click on the BackTrack5R1 VM
- Click on Play virtual machine
-
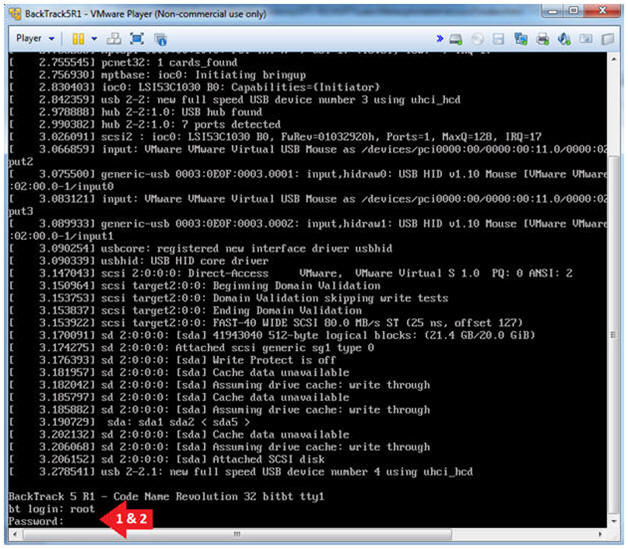
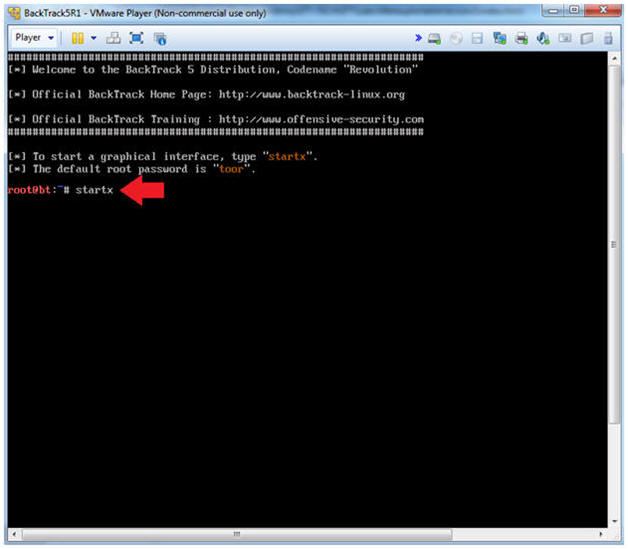
- Login to BackTrack
- Instructions:
- Login: root
- Password: toor or <whatever you changed it to>.
-
- Bring up the GNOME
- Instructions:
- Type startx
-
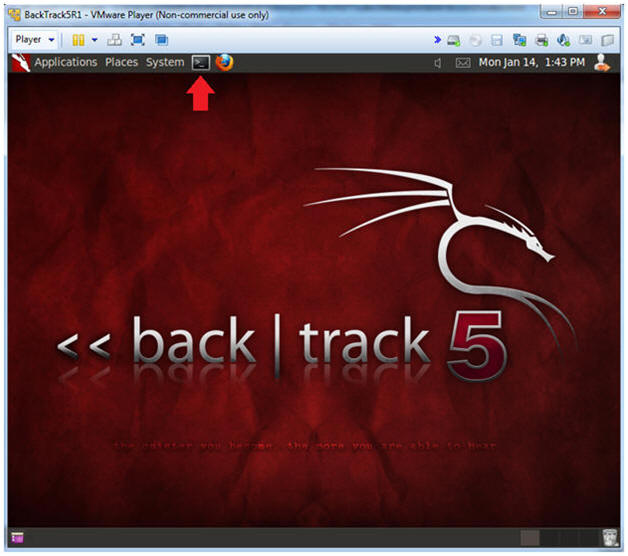
- Start up a terminal window
- Instructions:
- Click on the Terminal Window
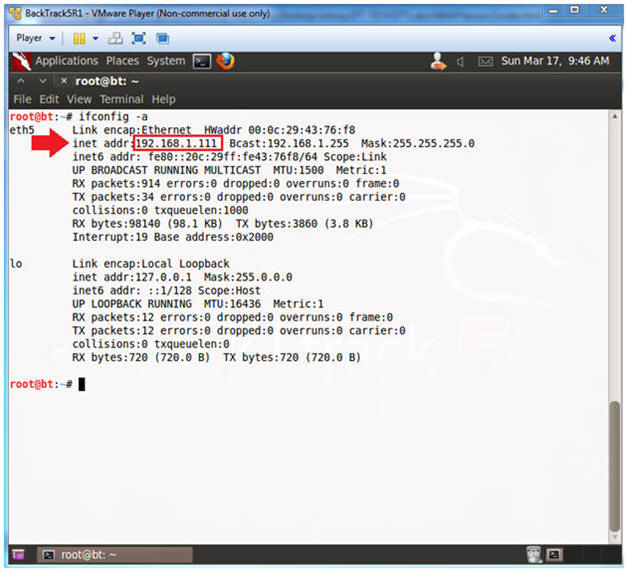
- Obtain the IP Address
- Instructions:
- ifconfig -a
- Note(FYI):
- My IP address 192.168.1.111.
- In your case, it will probably be different.
-
| 3. Try Starting the SSH Server |
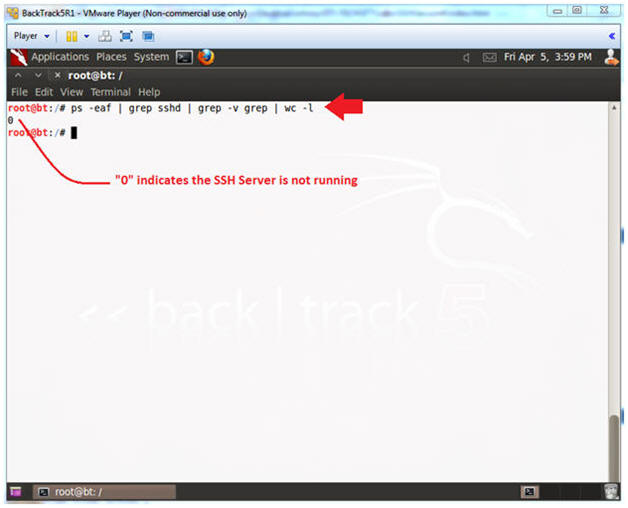
- Check for SSH Server Process
- Instructions:
- ps -eaf | grep sshd | grep -v grep | wc -l
- Note(FYI):
- ps -eaf: Show me all the processes.
- grep ssh: Show me only sshd process.
- grep -v grep: Don't show me my own grep process.
- wc -l: Count the number of lines (i.e., processes) returned.
- IF 0 is returned, THEN continue to next step.
- IF the number is greater than 0, THEN continue to next section.
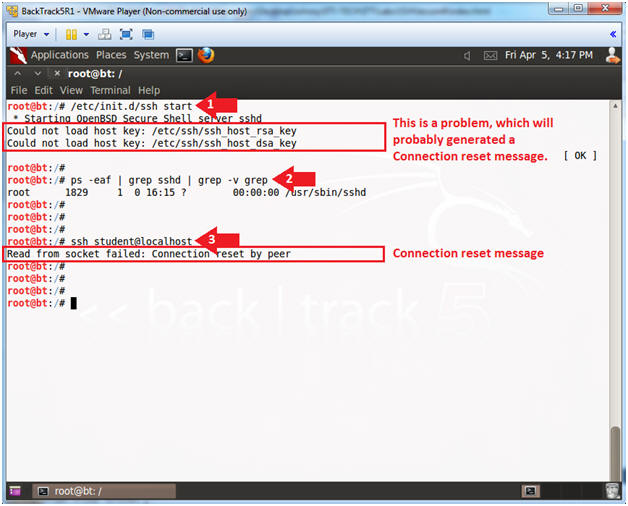
- Try Starting the SSH Server
- Instructions:
- /etc/init.d/ssh start
- ps -eaf | grep sshd | grep -v grep
- ssh student@localhost
- Note(FYI):
- For Step 2.1, the rsa and dsa host keys will probably not be generated.
- If Step 2.3, you will probably get a Connection reset by peer, since the host keys are not generated.
- If you did not receive the message from Step 2.1 and 2.3, then your ssh server is configured correctly and there is no reason to continue.
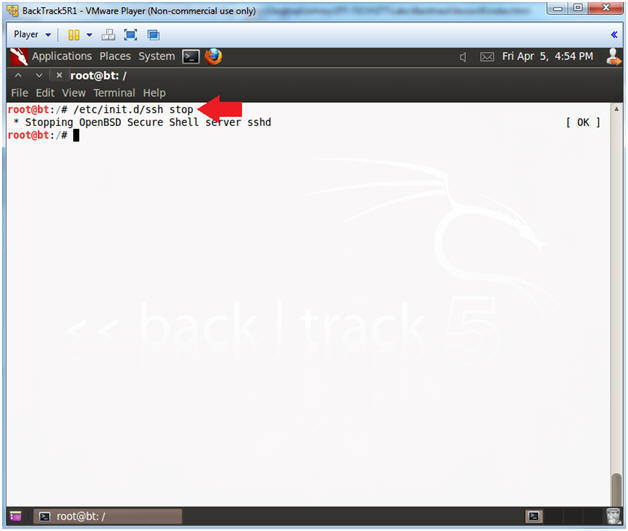
- Stop the SSH Server
- Instructions:
- /etc/init.d/ssh stop
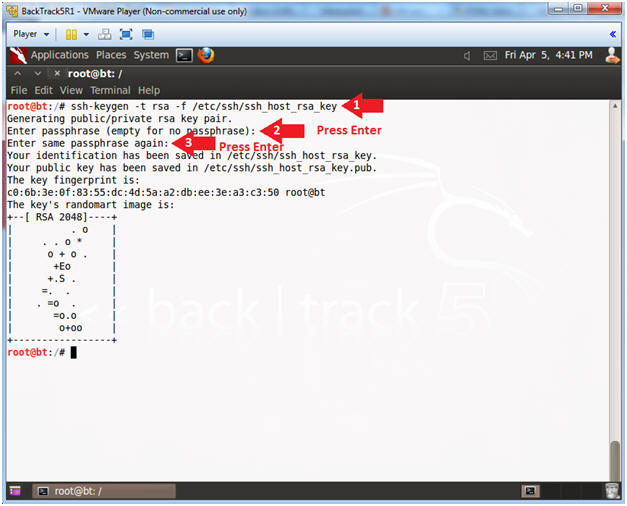
- Create RSA Host Key
- Instructions:
- ssh-keygen -t rsa -f /etc/ssh/ssh_host_rsa_key
- Press <Enter>
- Press <Enter>
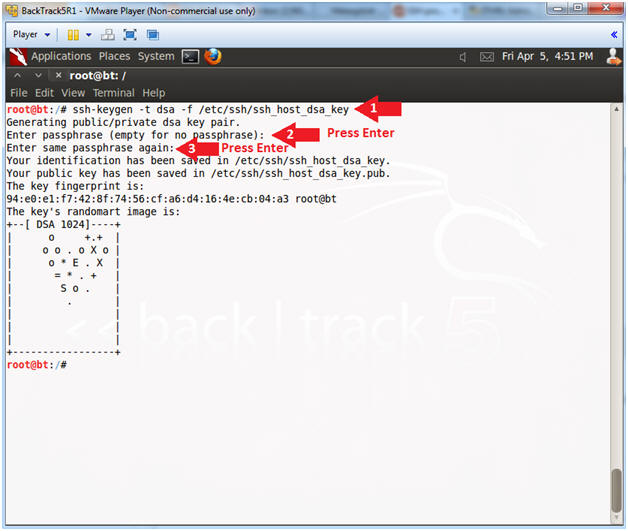
- Create DSA Host Key
- Instructions:
- ssh-keygen -t dsa -f /etc/ssh/ssh_host_dsa_key
- Press <Enter>
- Press <Enter>
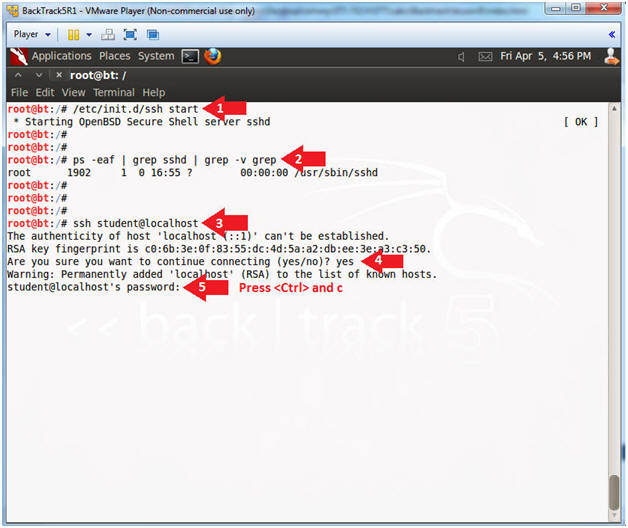
- Start the SSH Server
- Instructions:
- /etc/init.d/ssh start
- ps -eaf | grep sshd | grep -v grep
- ssh student@localhost
- yes
- Press <Ctrl> and c
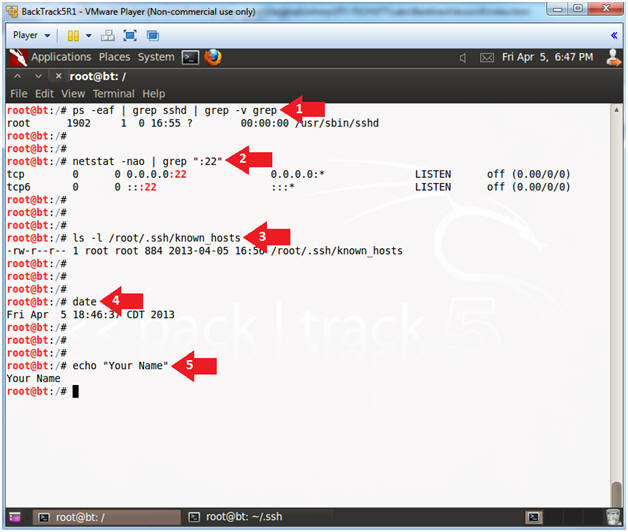
- Proof of Lab
- Instructions:
- ps -eaf | grep sshd | grep -v grep
- netstat -nao | grep ":22"
- ls -l /root/.ssh/known_hosts
- date
- echo "Your Name"
- This should be your actual name.
- e.g., echo "John Gray"
- Proof of Lab Instructions:
- Do a PrtScn
- Paste into a word document
- Upload to website www.antoanthongtin.edu.vn.
Không có nhận xét nào:
Đăng nhận xét