| Section 0. Background Information |
- Kaspersky Rescue CD
- Kaspersky Rescue CD is freely provided by Kaspersky Lab.
- Kaspersky provides a full suite of Virus Removal Tools.
- http://www.kaspersky.com/virus-removal-tools
- Lab Notes
- In this lab we will do the following:
- Download the Kaspersky iso
- Boot Windows 7 VM into the Kaspersky Rescue Environment
- Update Kaspersky
- Download a Virus Signature sample file called MALWARE-TESTFILE.exe (Note: This is not a virus, just a one-line signature)
- Run Kaspersky Antivirus Scan
- In this lab we will do the following:
- Prerequisites
- Instructions:
- Windows 7: Lesson 1: Installing Windows 7
- Instructions:
| Section 1. Download Kaspersky |
- Open A Firefox Browser
- Notes:
- Login to the machine that has VM Player Installed.
- Instructions:
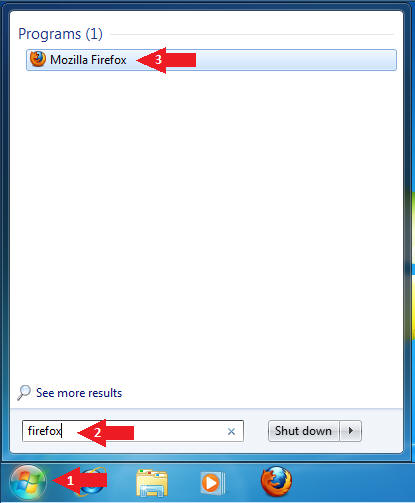
- Click on the Windows Start Button
- Type firefox in the search box
- Click on Mozilla Firefox
- Notes:
- Open A Firefox Browser
- Instructions:
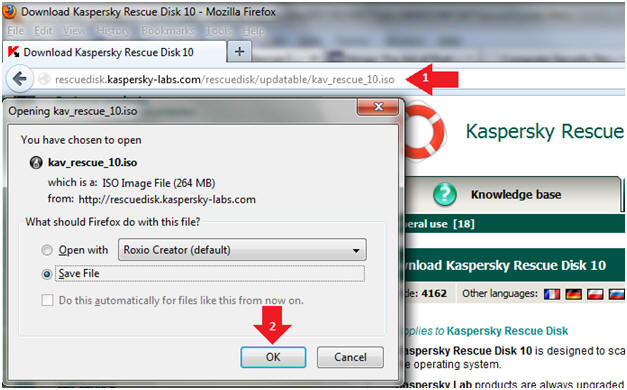
- Place the following address in the Firefox Browser
- http://rescuedisk.kaspersky-labs.com/rescuedisk/updatable/kav_rescue_10.iso
- Click OK to download
- Instructions:
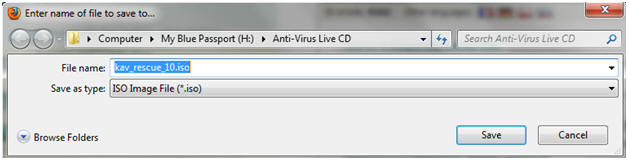
- Navigate and Save
- Instructions:
- Navigate to your external USB hard drive.
- Create a directory call Anti-Virus Live CD on your
- Click Save
- Instructions:
| Section 2. Start your Windows 7 VM |
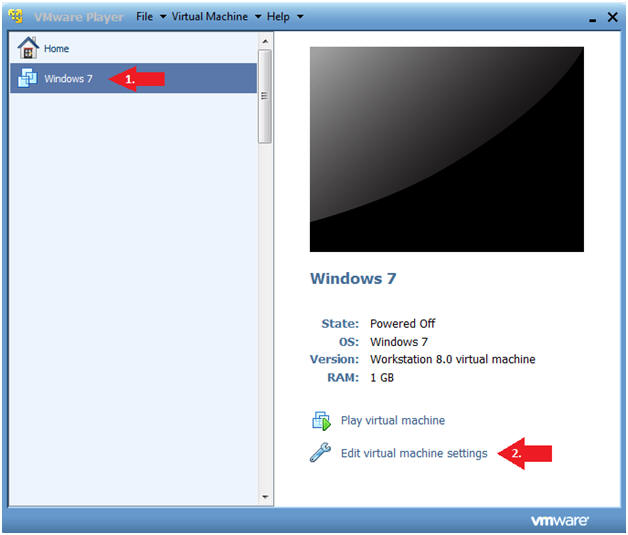
- Edit Virtual Machine Settings
- Instructions:
- Click on Windows 7
- Click on Edit virtual machine
- Instructions:
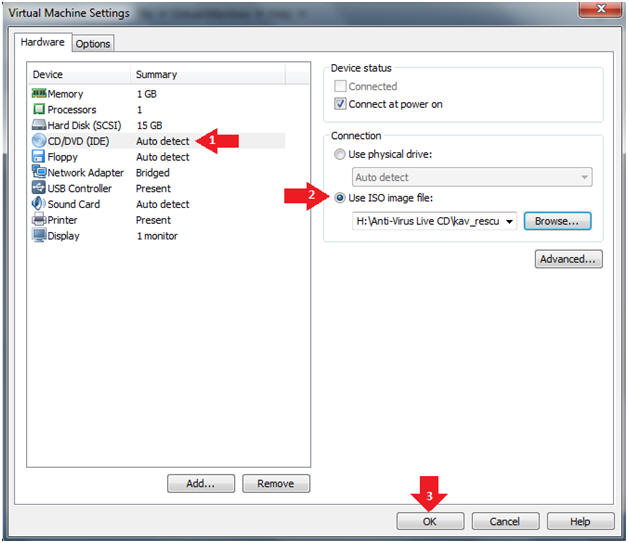
- Configure CD/DVD (IDE)
- Instructions
- Configure CD/DVD (IDE)
- Click the radio button "Use ISO image file:"
- Click the Browse button and Navigate to the location of the kav_rescue_10.iso
- Click the Okay button
- Instructions
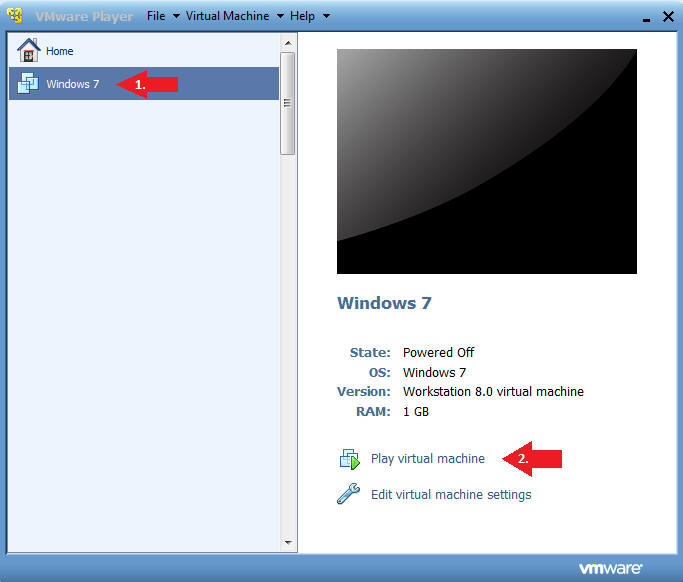
- Start Windows 7
- Instructions:
- Click on Windows 7
- Click on Play virtual machine
- Instructions:
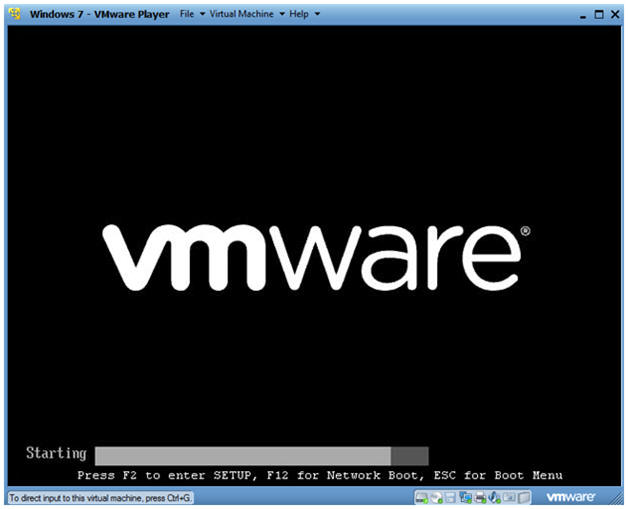
- Access the Boot Menu
- Instructions
- Once you see the below vmware screen, (1) Left Click in the screen and (2) press the <Esc> key.
- Instructions
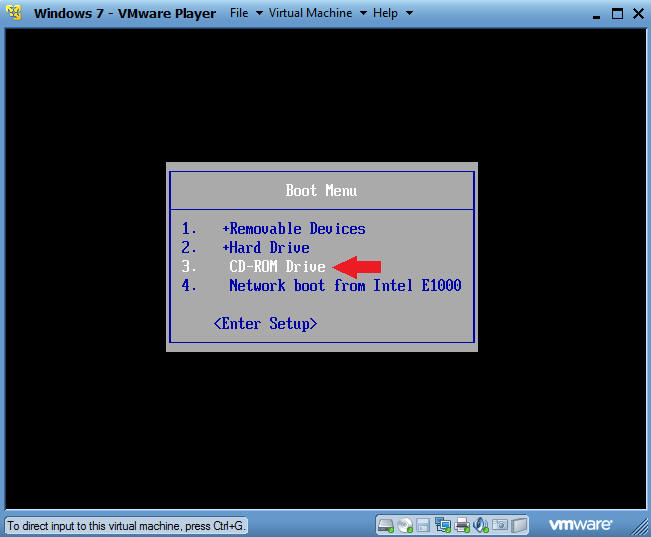
- Boot from CD-ROM Drive
- Instructions
- Arrow Down to where CD-ROM Drive is highlighted
- Press <Enter>
- Instructions
| Section 3. Using Kaspersky Rescue CD |
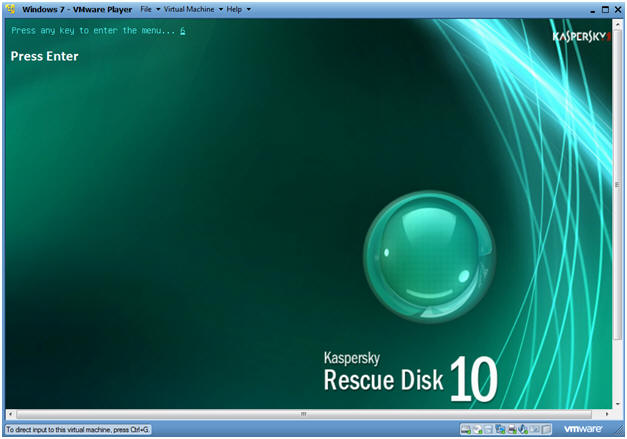
- Press any key to enter the menu
- Instructions
- Press <Enter>
- Instructions
- Select Language
- Instructions
- Select Language of Choice, English is default.

- Instructions
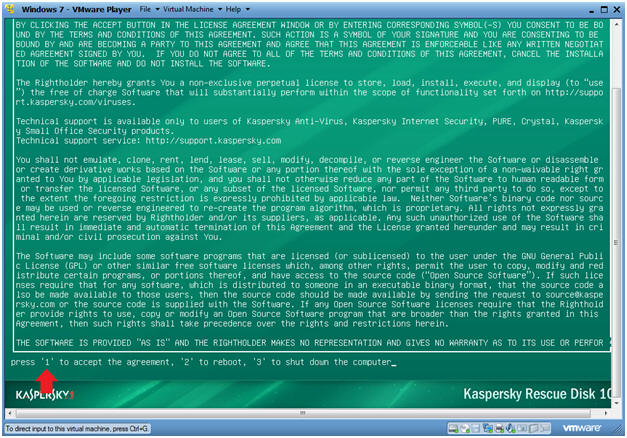
- Accept Agreement
- Instructions
- Press "1"
- Instructions
- Select Rescue Type
- Instructions
- Select "Kaspersky Rescue Disk. Graphic Mode"
- Press <Enter>
-

- Instructions
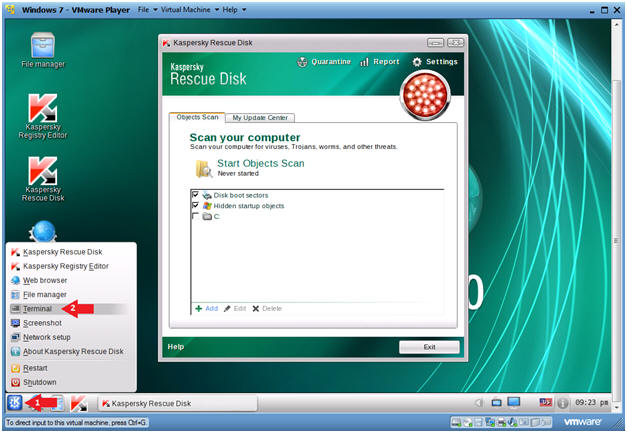
- Open a Terminal
- Instructions
- Select KDE Start Button
- Select Terminal
-
- Instructions
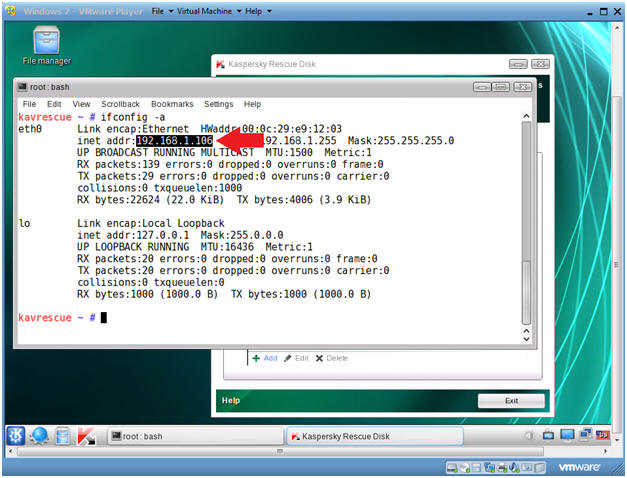
- Get IP Address
- Instructions
- ifconfig -a
- Notes (FYI)
- If you do not have an IP Address, do the following:
- /etc/init.d/network restart
OR - dhclient eth0
- /etc/init.d/network restart
- If you do not have an IP Address, do the following:
-
- Instructions
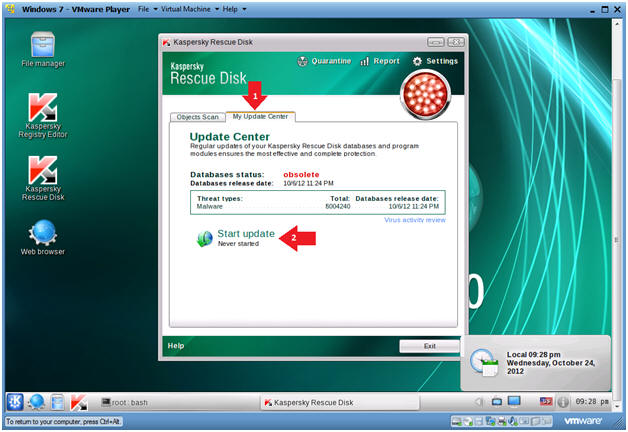
- Update Kaspersky
- Instructions
- Click the "My Update Center" tab
- Click Start update
- Instructions
| Section 4. Download MALWARE-TESTFILE.exe |
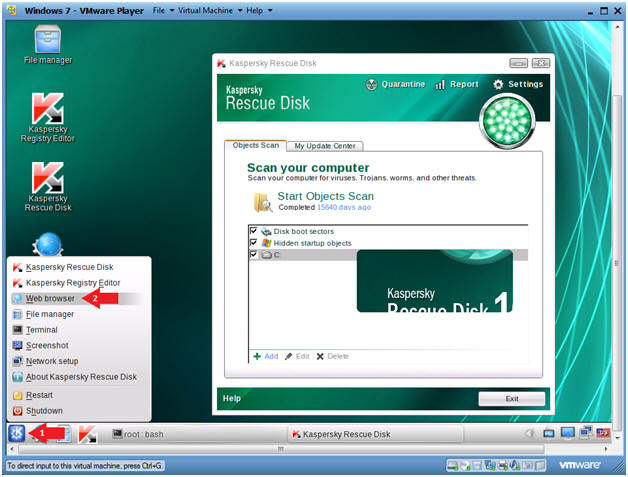
- Open A Konqueror Web Browser
- Instructions
- Click the KDE Start Button
- Click the Web Browser
- Instructions
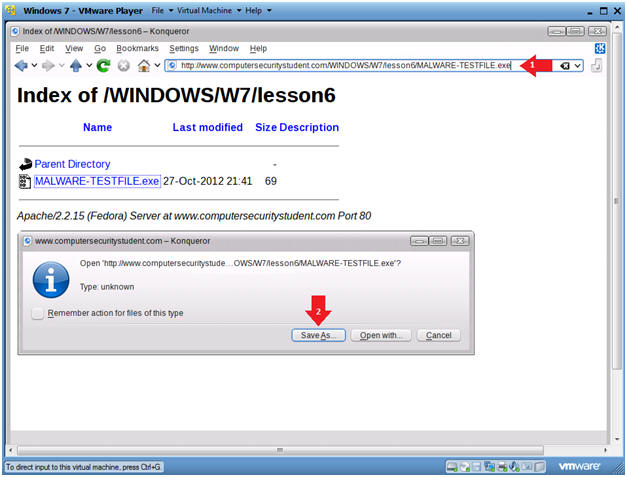
- Download MALWARE-TESTFILE.exe
- Note(FYI):
- The file MALWARE-TESTFILE.exe is not a virus.
- It contains only the below one-line virus signature that we will use to test Kaspersky.
- X5O!P%@AP[4\PZX54(P^)7CC)7}$EICAR-STANDARD-ANTIVIRUS-TEST-FILE!$H+H*
- Instructions:
- In the Konqueror Address Bar, place the following web address
- http://www.computersecuritystudent.com/WINDOWS/W7/lesson6/MALWARE-TESTFILE.exe
- Click the Save As... Button
- In the Konqueror Address Bar, place the following web address
- Note(FYI):
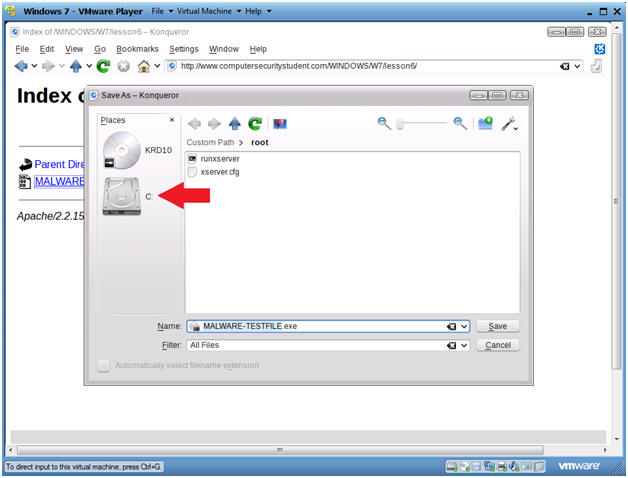
- Navigate to C: Drive
- Instructions
- Click on the C Drive Picture
- Instructions
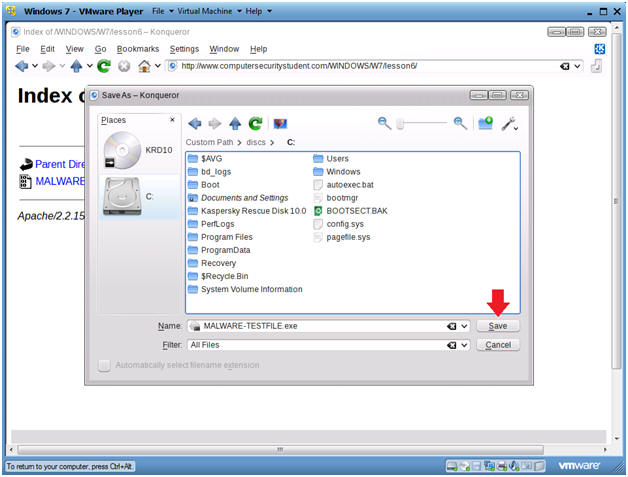
- Save MALWARE-TESTFILE.exe
- Instructions
- Click Save
- Instructions
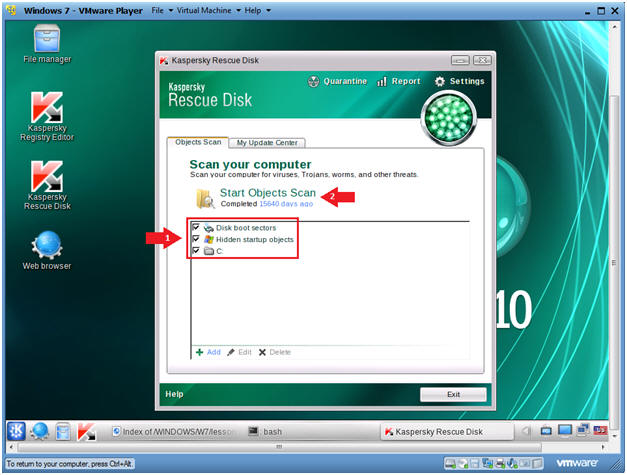
- Start Objects Scan
- Instructions
- Click on All Three Check Boxes
- Click on Start Objects Scan
- Instructions
- Rescue Disk Alarm
- Notes (FYI):
- Kaspersky detected the c:/MALWARE-TESTFILE.exe
- Instructions
- Click on Delete
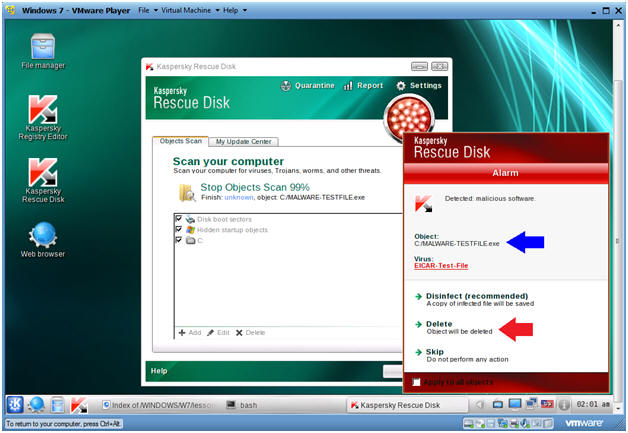
- Notes (FYI):
- Open Report
- Instructions
- Click the Report Link
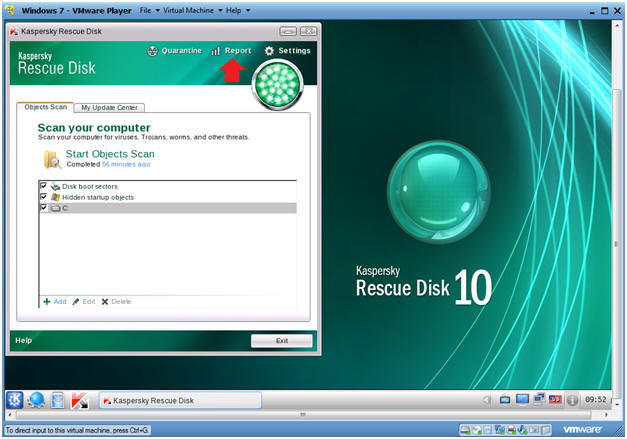
- Instructions
- View Detailed Results
- Instructions:
- Click Report
- Click Detailed Report
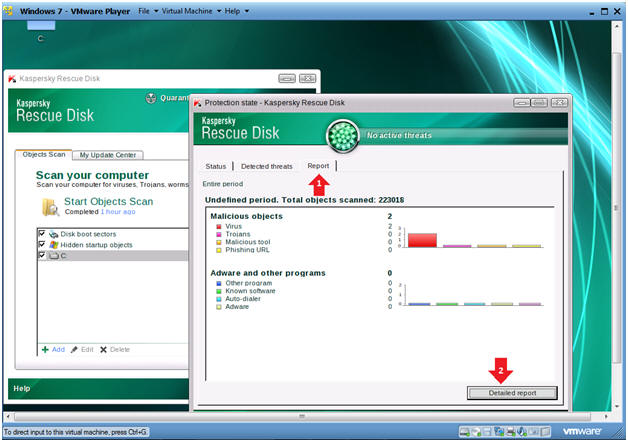
- Instructions:
- View Last Object Scan
- Instructions
- Click On the Last Object Scan
- View the Detected Viruses
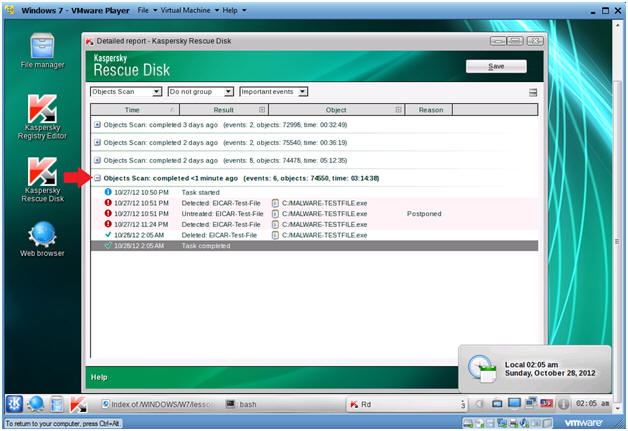
- Instructions
| Section 5. Proof of Lab |
- Open A Terminal
- Instructions
- Click on the KDE Start Button
- Click on Terminal
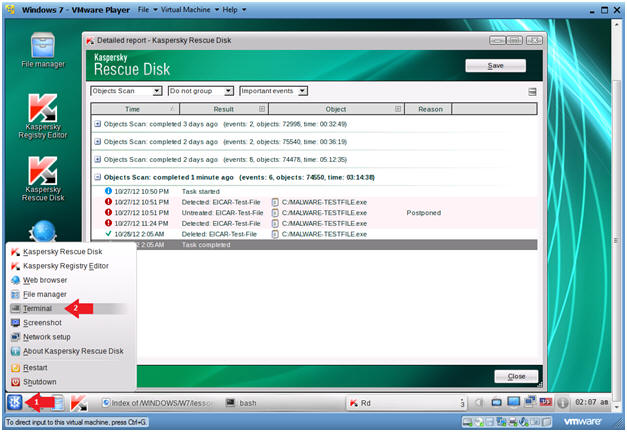
- Instructions
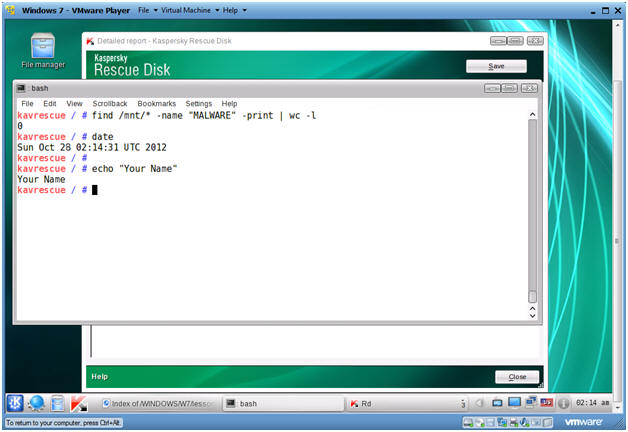
- Proof of Lab Instructions
- Instructions:
- find /mnt/* -name "*.exe" | grep MALWARE | wc -l
- This command returns a "0" because the sample virus was deleted.
- date
- Press <Enter>
- echo "Your Name"
- Replace the string "Your Name" with your actual name.
- e.g., echo "John Gray"
- Do a PrtScn
- Paste into a word document
- Upload to website www.antoanthongtin.edu.vn
- find /mnt/* -name "*.exe" | grep MALWARE | wc -l
- Instructions:
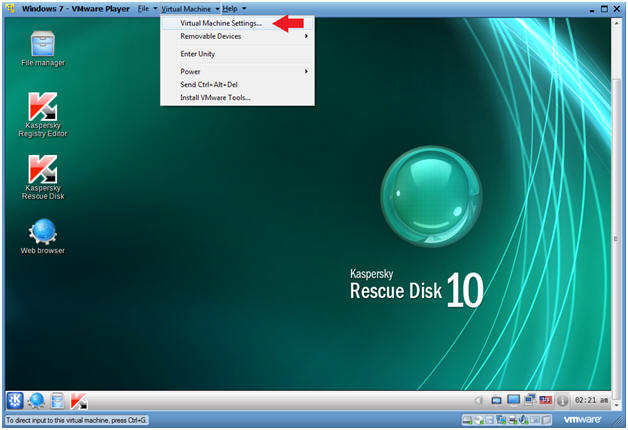
- Edit Virtual Machine Settings
- Instructions:
- From the VM Player Menu Bar do the following:
- Select Virtual Machine
- Select Virtual Machine Settings...
- Instructions:
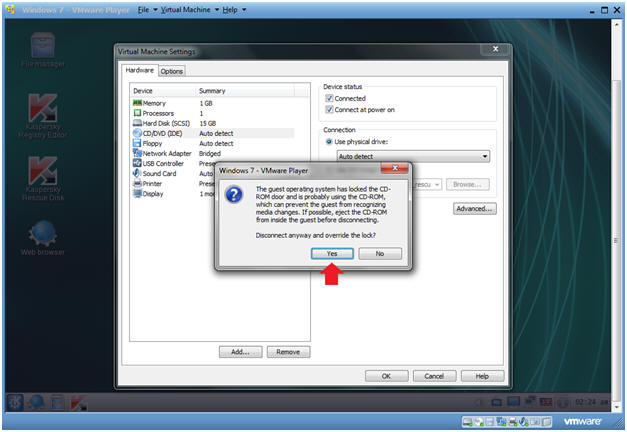
- Edit CD/DVD (IDE)
- Instructions:
- Select CD/DVD (IDE)
- Select the Connection radio button: Use physical drive, with Auto detect selected.
- Click the OK Button

- Instructions:
- Windows 7 - VMware Player CD-ROW Disconnect Message
- Instructions:
- Select Yes
- Instructions:
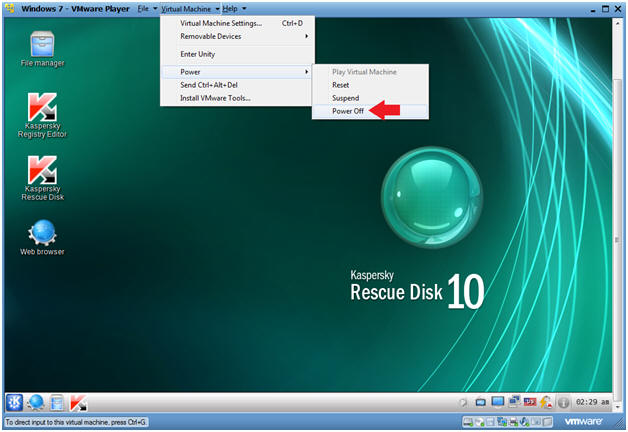
- Power Off
- Instructions:
- Virtual Machine --> Power --> Power Off
- Instructions:
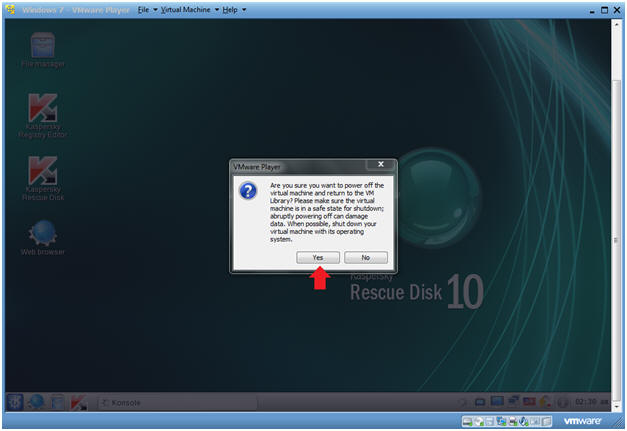
- VMware Player Message
- Instructions:
- Select Yes
- Instructions:
Không có nhận xét nào:
Đăng nhận xét