{ Install Nessus on BackTrack 5R1/2 }
| Section 0. Background Information |
- What is NESSUS?
- Tenable Network Security provides enterprise-class solutions for continuous monitoring and visibility of vulnerabilities, configurations, user activity and system events that impact security and compliance.
- Nessus features high-speed discovery, configuration auditing, asset profiling, sensitive data discovery and vulnerability analysis of your security posture
- Pre-Requisite
- Lab Notes
- In this lab we will do the following:
- Install Nessus.
- Start the Nessus service
- Configure Nessus certificate
- Login Nessus
- In this lab we will do the following:
- Legal Disclaimer - Đào Tạo An Toàn Thông Tin (Www.AnToanThongTin.Edu.Vn)
| Section 1. Login to BackTrack |
- Start Up VMWare Player
- Instructions:
- Click the Start Button
- Type Vmplayer in the search box
- Click on Vmplayer

- Instructions:
- Open a Virtual Machine
- Instructions:
- Click on Open a Virtual Machine

- Instructions:
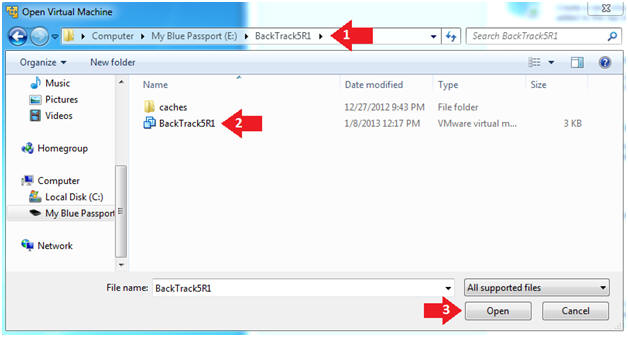
- Open the BackTrack5R1 VM
- Instructions:
- Navigate to where the BackTrack5R1 VM is located
- Click on on the BackTrack5R1 VM
- Click on the Open Button
- Instructions:
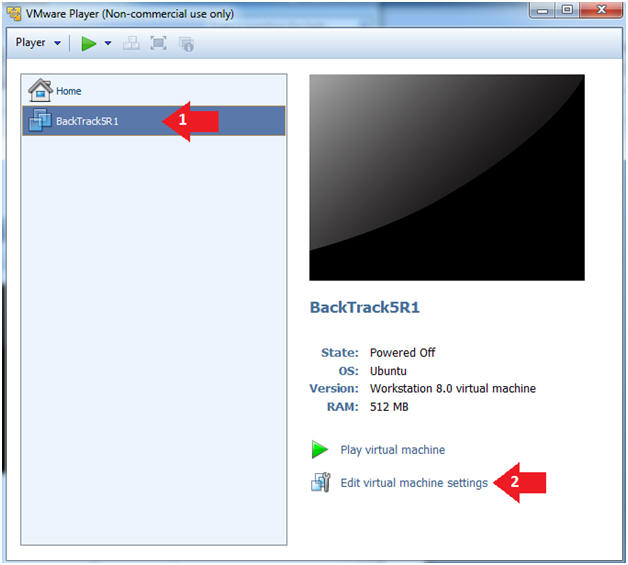
- Edit the BackTrack5R1 VM
- Instructions:
- Select BackTrack5R1 VM
- Click Edit virtual machine settings
- Instructions:
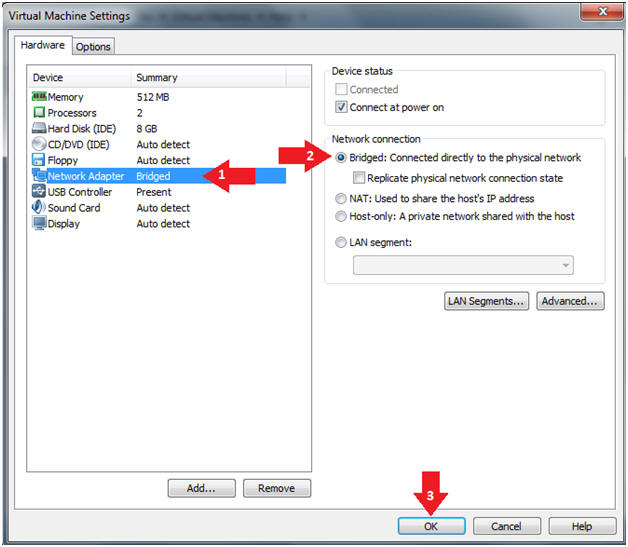
- Edit Virtual Machine Settings
- Instructions:
- Click on Network Adapter
- Click on the Bridged Radio button
- Click on the OK Button
- Instructions:
- Play the BackTrack5R1 VM
- Instructions:
- Click on the BackTrack5R1 VM
- Click on Play virtual machine

- Instructions:
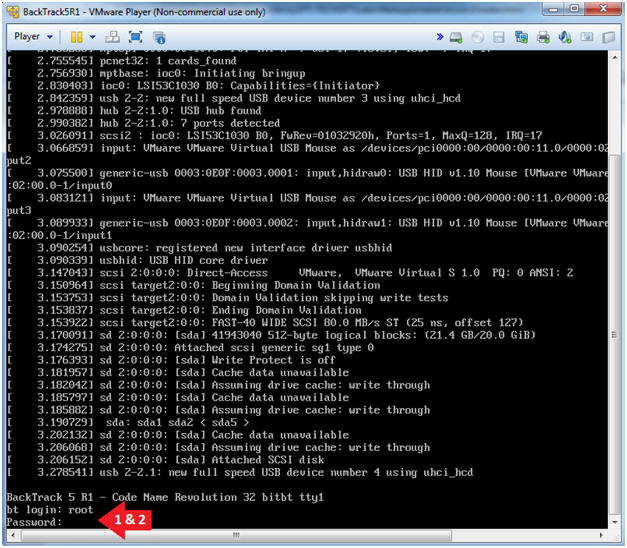
- Login to BackTrack
- Instructions:
- Login: root
- Password: toor or <whatever you changed it to>.
- Instructions:
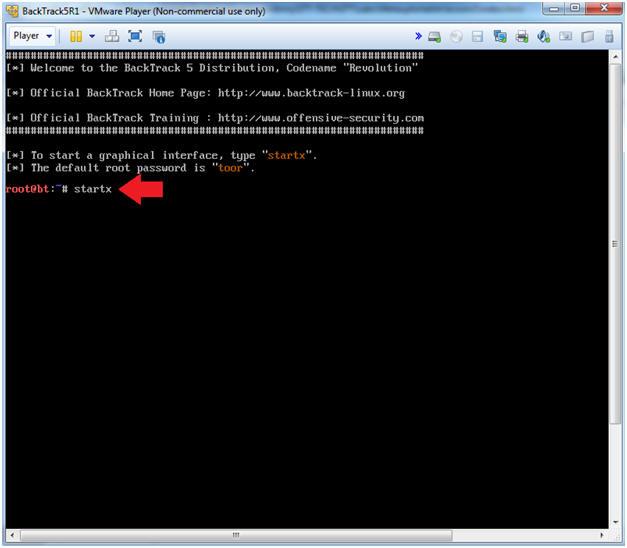
- Bring up the GNOME
- Instructions:
- Type startx
- Instructions:
| Section 2. Bring up a console terminal |
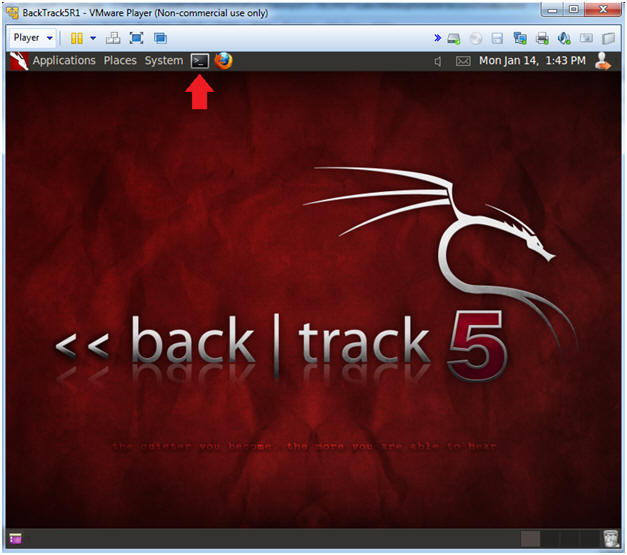
- Start up a terminal window
- Instructions:
- Click on the Terminal Window
- Instructions:
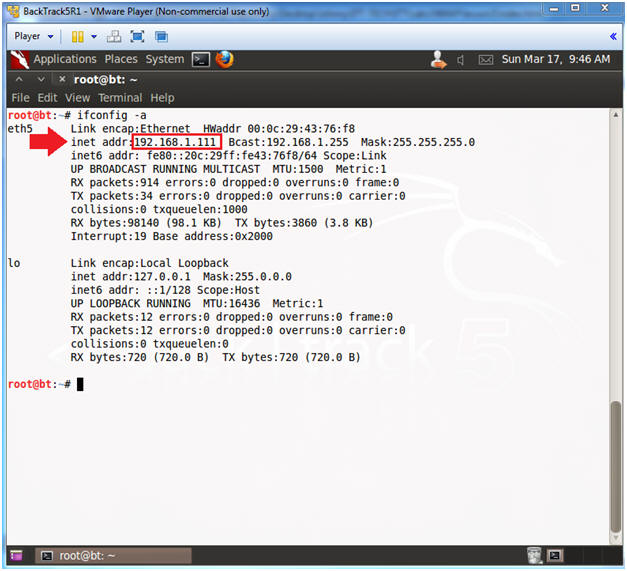
- Obtain the IP Address
- Instructions:
- ifconfig -a
- Note(FYI):
- My IP address 192.168.1.111.
- In your case, it will probably be different.
- Instructions:
| Section 3. Download Nessus |
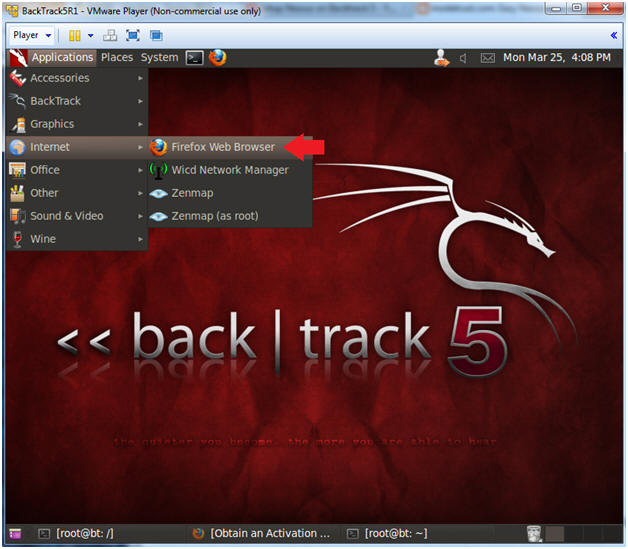
- Start Firefox
- Instructions:
- Applications --> Internet --> Firefox Web Browser
- Instructions:
- Navigate to Tenable Download
- Instructions
- Place the following URL in the address bar.
- http://www.tenable.com/products/nessus/select-your-operating-system
- Click on Nessus-5.2.3-ubuntu910_amd64.deb
- Place the following URL in the address bar.
- Instructions
- Subscription Agreement
- Instructions
- Click on Agree

- Instructions
- Would you like to save this file?
- Instructions
- Click Save File

- Instructions
- Save File
- Instructions
- Click on the root folder
- Click the Save Button

- Instructions
- Close Downloads
- Instructions
- Click the "X" to close.

- Instructions

| Section 4. Install Nessus |
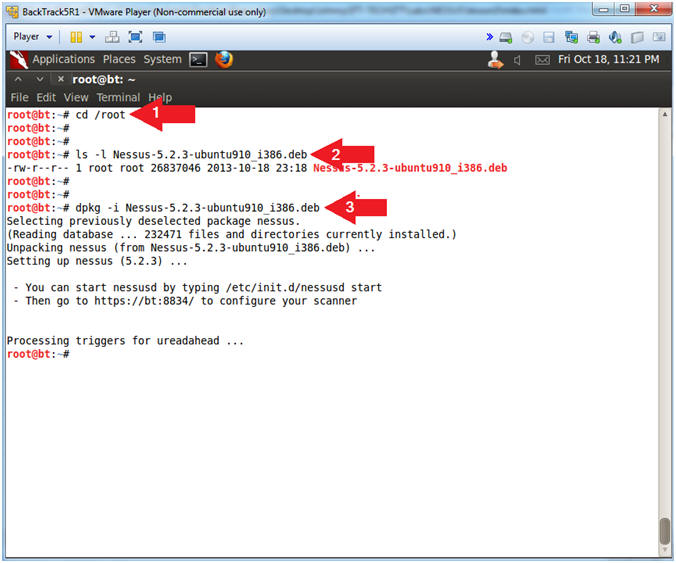
- Search for nessus
- Instructions
- cd /root
- ls -l Nessus*
- dpkg -i Nessus*
- Notes
- For steps #2 and #3 I am using a the wildcard(*) just encase the version changes.
- Instructions
| Section 5. Obtain Nessus Activation Code |
- Start Firefox
- Instructions:
- Applications --> Internet --> Firefox Web Browser
- Instructions:
- Obtain Registration Code
- Instructions:
- Place the following URL into Firefox
- http://www.tenable.com/products/nessus/nessus-homefeed
- Supply First Name
- Supply Last Name
- Supply Email
- Click on the "I Agree" Checkbox
- Click the Register Button
- Place the following URL into Firefox
- Instructions:

| Section 6. Register Nessus |
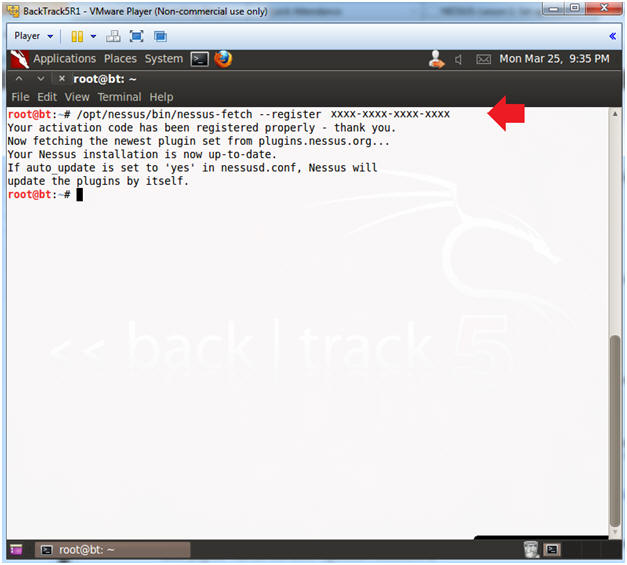
- Register Nessus
- Instructions:
- /opt/nessus/bin/nessus-fetch --register xxxx-xxxx-xxxx-xxxx
- Note(FYI):
- Replace "xxxx-xxxx-xxxx-xxxx" with the activation code sent to your inbox from Tenable.
- My activation code is x'ed out on purpose.
- This might take 5 to 10 minutes.
- Instructions:
| Section 7. Create Nessus User |
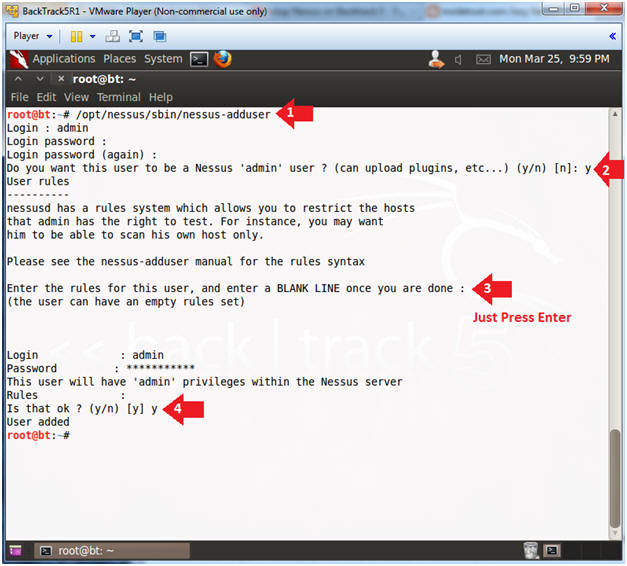
- Add Nessus User
- Instructions:
- /opt/nessus/sbin/nessus-adduser
- Login: admin
- Login password: <Supply Password>
- Login password: (again): <Supply Password>
- Do you want this user to be an admin user? y
- Enter the rules: Just Press Enter
- Is that ok ?: y
- /opt/nessus/sbin/nessus-adduser
- Instructions:
| Section 8. Start the Nessus Service |
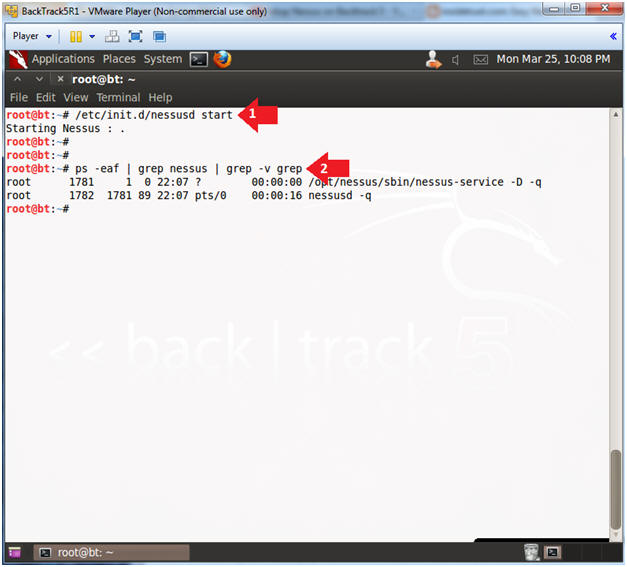
- Start Nessus Service
- Instructions:
- /etc/init.d/nessusd start
- ps -eaf | grep nessus | grep -v grep
- ps -eaf: Show me all processes
- | grep nessus: Only show me nessus processes.
- | grep -v grep: Do not show my actual grep process.
- Instructions:
| Section 9. Configure Certificate |
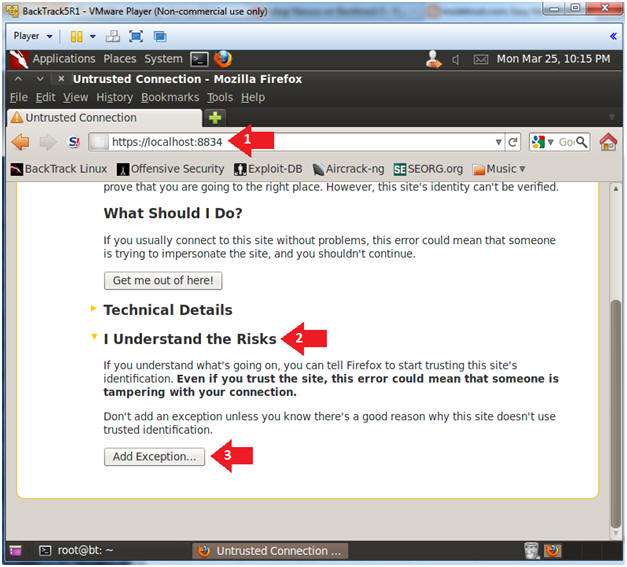
- Certificate Exception
- Instructions:
- Place the following URL in the Firefox Browser.
- Click on I Understand the Risks
- Click on the Add Exception Button
- Instructions:
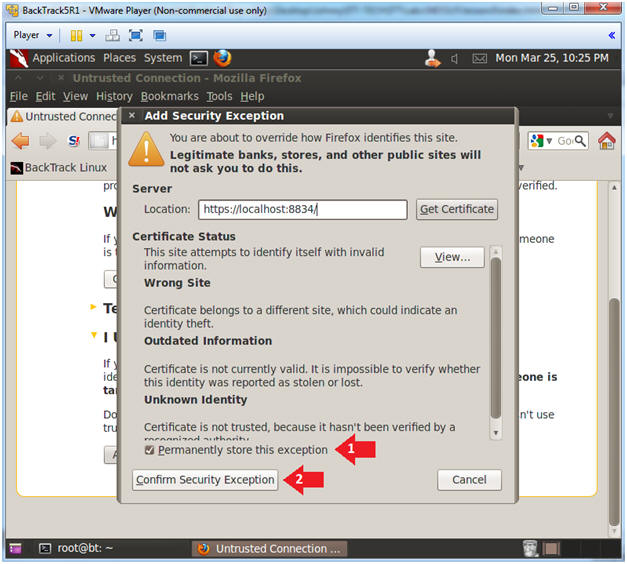
- Add Security Exception
- Instructions:
- Click the "Permanently store this exception" checkbox
- Click the "Confirm Security Exception" button
- Instructions:
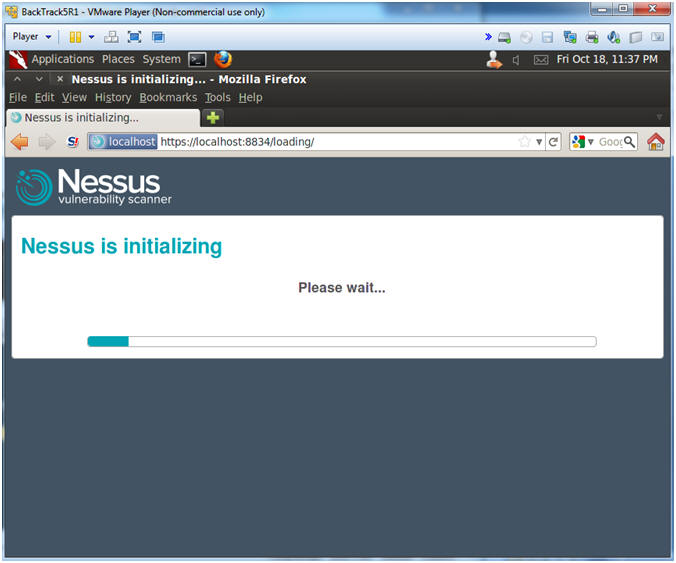
- Nessus Initialization
- Note(FYI):
- The initialization could take anywhere from 5 to 15 minutes.
- Note(FYI):
| Section 10. Login to Nessus |
- Logging into Nessus
- Instructions:
- Username: admin
- Password: <Whatever you set it too>

- Instructions:
- Welcome to Nessus
- Note(FYI):
- Do not click Sign Out until you complete the proof of lab.

- Note(FYI):
| Section 12. Proof of Lab |
- Proof of Lab
- Instructions
- netstat -nao | grep 8834 | grep -v grep
- echo "Your Name"
- Put in your actual name in place of "Your Name"
- e.g., echo "John Gray"
- date
- Proof Of Lab Instructions:
- Press the PrtScn key
- Paste into a word document
- Upload to website Www.AnToanThongTin.Edu.Vn

- Instructions
- Logout of Nessus
- Instructions:
- Click the "Sign Out" link.

- Instructions:
Không có nhận xét nào:
Đăng nhận xét