{ Set up scans and read results }
| Background Information |
- What is NESSUS?
- Tenable Network Security provides enterprise-class solutions for continuous monitoring and visibility of vulnerabilities, configurations, user activity and system events that impact security and compliance.
- Nessus features high-speed discovery, configuration auditing, asset profiling, sensitive data discovery and vulnerability analysis of your security posture.
-
- Reference Link:
- Lab Notes
- In this lab we will do the following:
- Create a Nessus Internal Scan
- Scan Damn Vulnerable WXP-SP2
- Analyze Results
- Export Results
- In this lab we will do the following:
- Legal Disclaimer
- Đào tạo an toàn thông tin - Www.AnToanThongTin.Edu.Vn
| Section 1: Login to PENTEST-WXP (Attacking Machine) |
- Start Up VMWare Player
- Instructions:
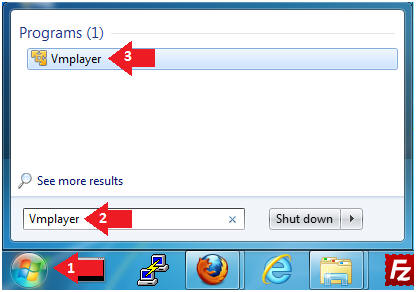
- Click the Start Button
- Type Vmplayer in the search box
- Click on Vmplayer
- Instructions:
- Edit Virtual Machine Settings
- Instructions:
- Click on PENTEST-WXP
- Edit Virtual Machine Settings
- Note:
- This VM is running Windows XP.
- Instructions:
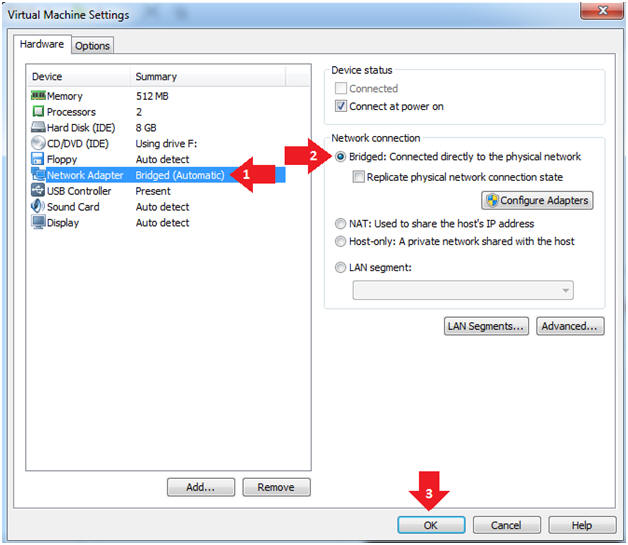
- Set Network Adapter
- Instructions:
- Click on Network Adapter
- Click on the radio button "Bridged: Connected directly to the physical network".
- Instructions:
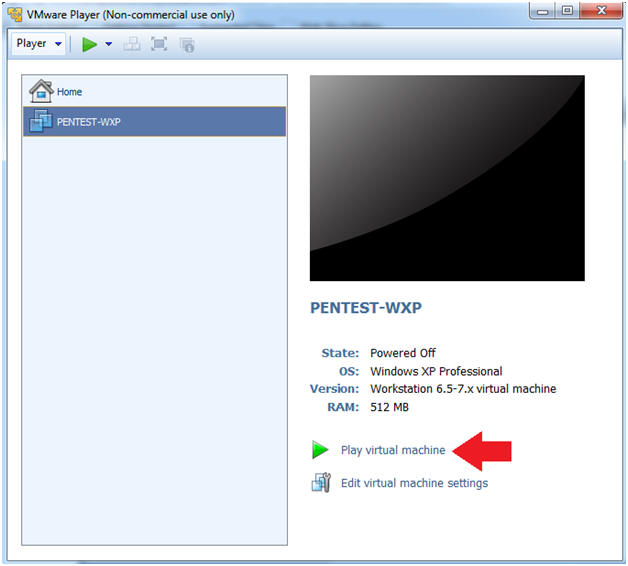
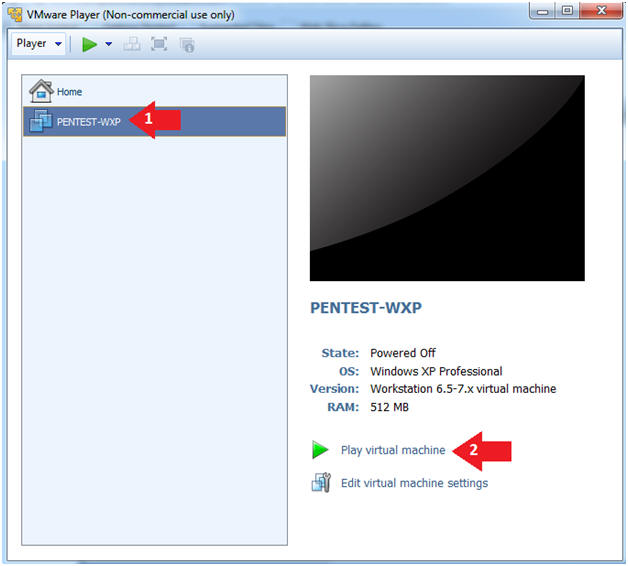
- Start Up PENTEST-WXP
- Instructions:
- Click Play virtual machine
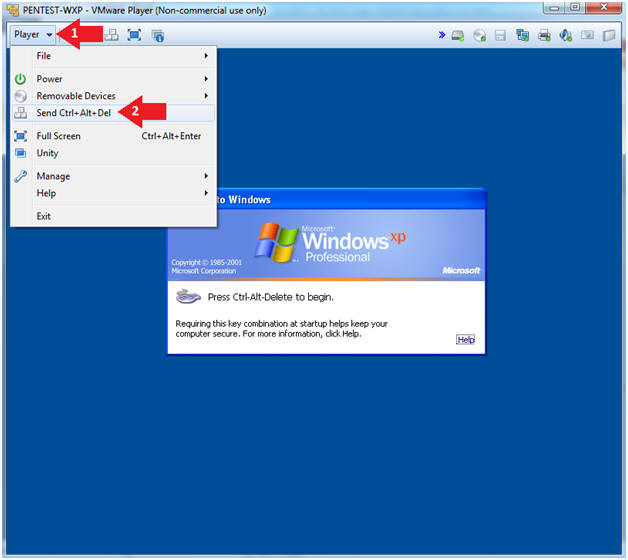
- Instructions:
- Send Ctrl+Alt+Del
- Instructions:
- Click Player
- Click Send Ctrl+Alt+Del
- Instructions:
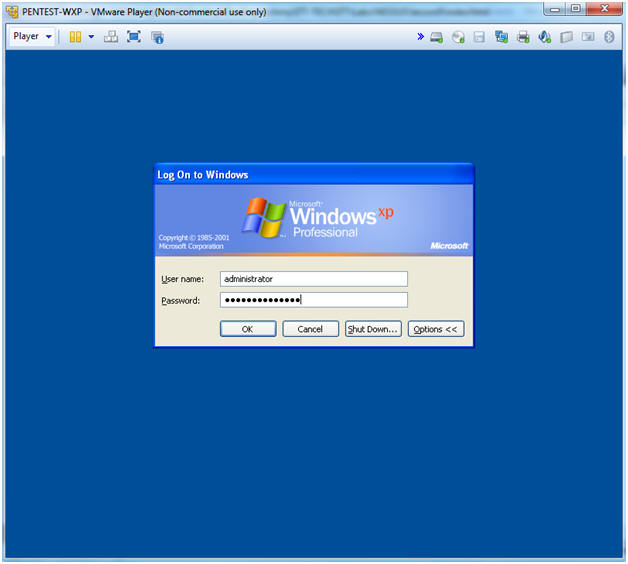
- Logging into PENTEST-WXP
- Instructions:
- Username: administrator
- Password: Supply your password
- Instructions:
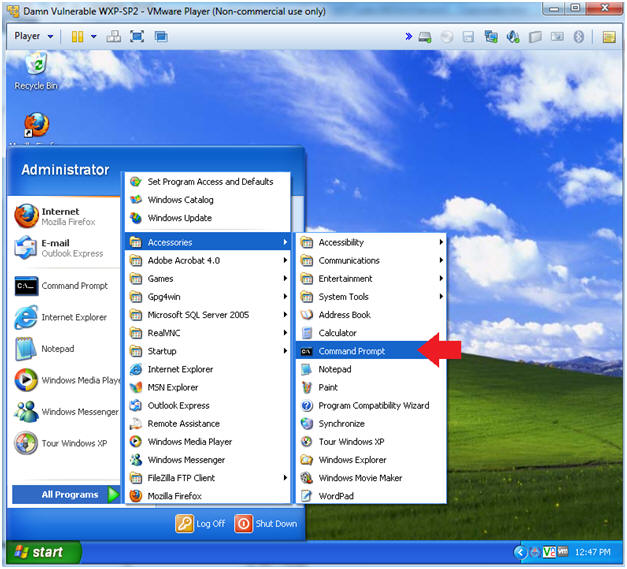
- Open a Command Prompt
- Instructions:
- Start --> All Programs --> Accessories --> Command Prompt
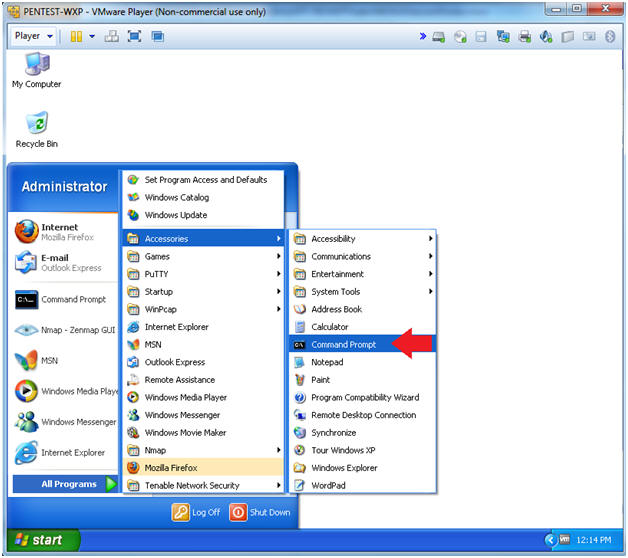
- Instructions:
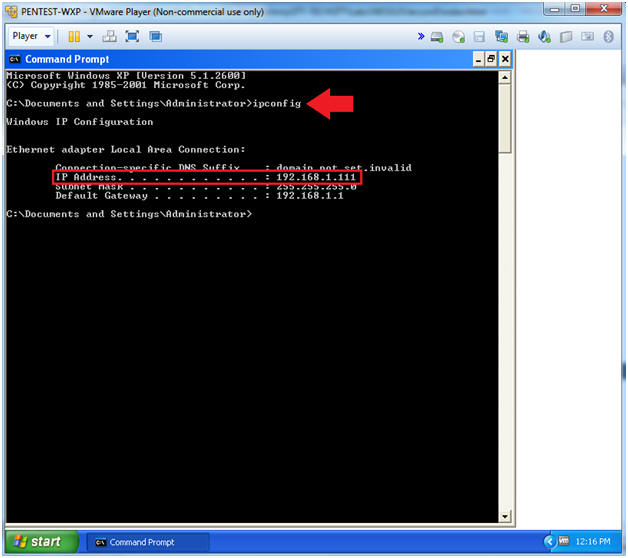
- Determine IP Address
- Instructions:
- ipconfig
- Note(FYI):
- My IP Address is 192.168.1.111.
- Your IP Address will probably be different.
- Instructions:
| Section 2: Login to Damn Vulnerable WXP-SP2 (Victim Machine) |
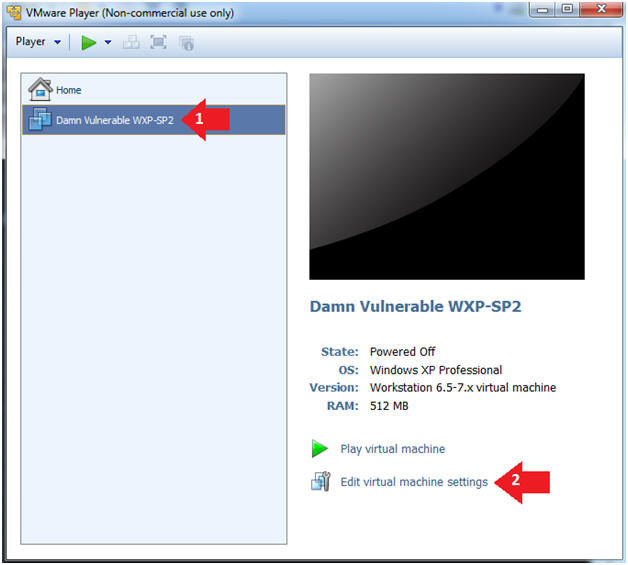
- Edit Virtual Machine Settings
- Instructions:
- Click on Damn Vulnerable WXP-SP2
- Edit Virtual Machine Settings
- Note:
- This VM is running Windows XP.
- This is the Victim Machine that we will be scanning with PENTEST-WXP.
- Instructions:
- Set Network Adapter
- Instructions:
- Click on Network Adapter
- Click on the radio button "Bridged: Connected directly to the physical network".
- Instructions:
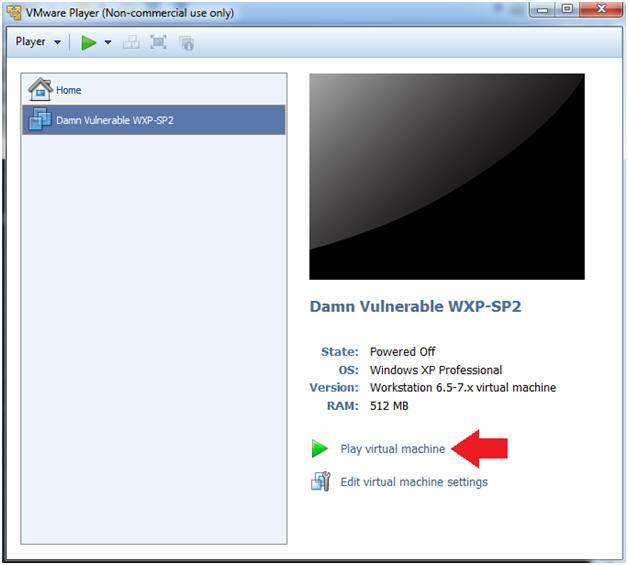
- Start Up Damn Vulnerable WXP-SP2.
- Instructions:
- Start Up your VMware Player
- Play virtual machine
- Instructions:
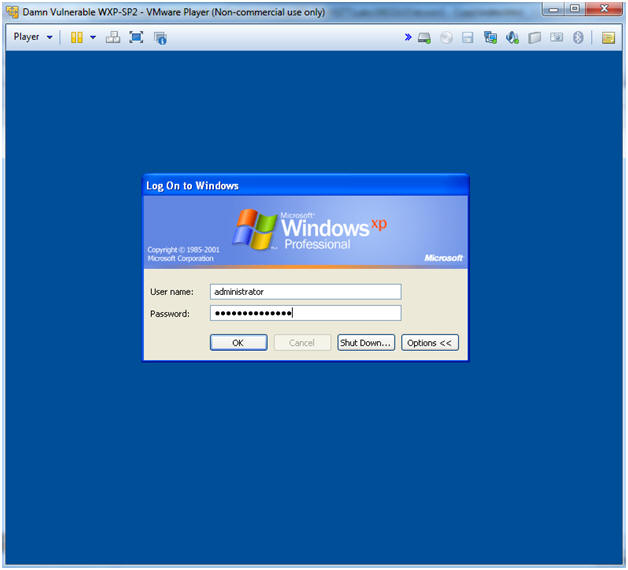
- Logging into Damn Vulnerable WXP-SP2.
- Instructions:
- Username: administrator
- Password: Use the Class Password or whatever you set it.
- Instructions:
- Open a Command Prompt
- Instructions:
- Start --> All Programs --> Accessories --> Command Prompt
- Instructions:
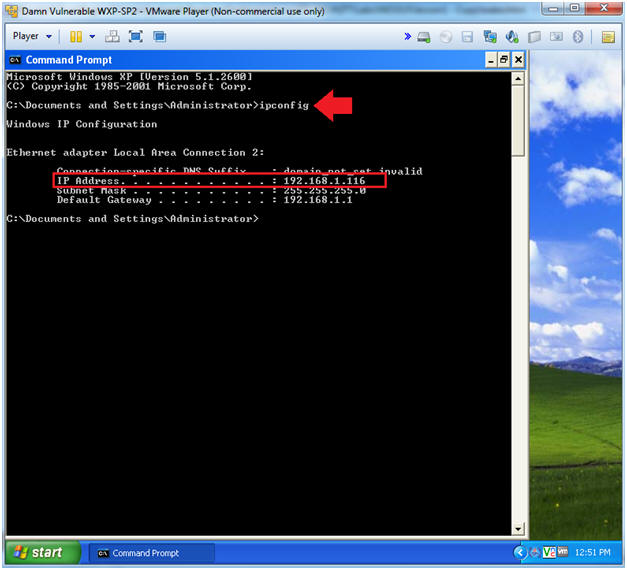
- Obtain the IP Address
- Instructions:
- In the Command Prompt type "ipconfig"
- Note(FYI):
- In my case, Damn Vulnerable WXP-SP2's IP Address 192.168.1.116.
- This is the IP Address of the Victim Machine.
- Record your IP Address.
- Instructions:
| Section 3: Login to Nessus |
- Start the Nessus Web Client
- Instructions:
- Make sure you are on PENTEST-WXP
- Click on the Nessus Web Client located on the desktop
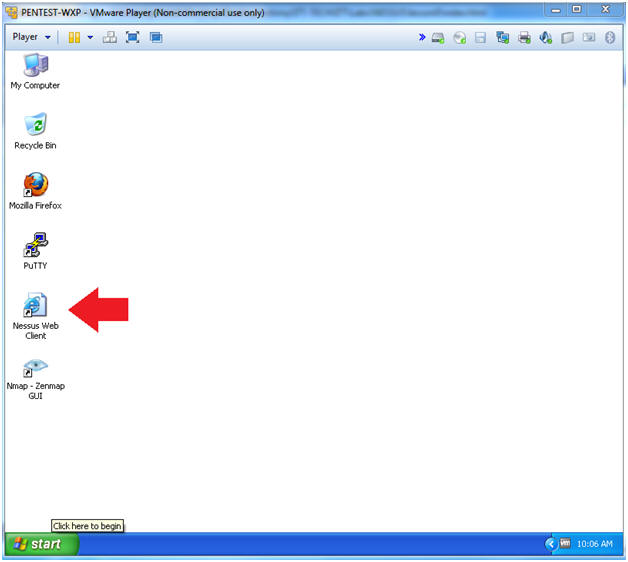
- Instructions:
- Login To Nessus
- Instructions:
- Username: admin
- Password: Supply your password
- Click the Sign In To Continue Button
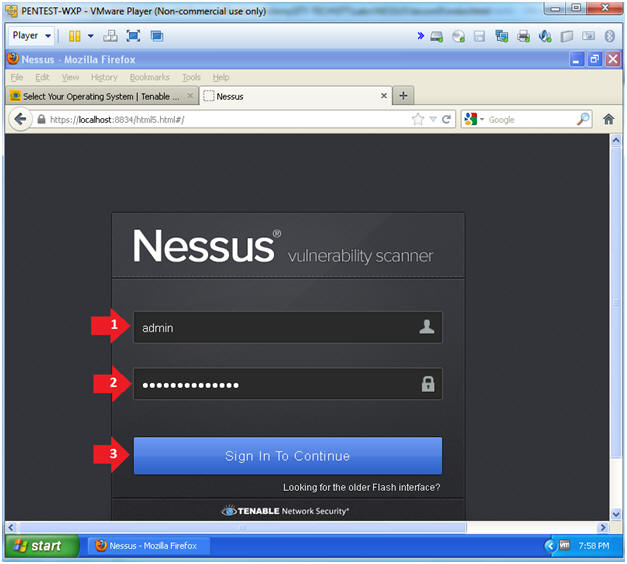
- Instructions:
| Section 4: Creating a Scan |
- Click on Scan
- Instructions:
- Click on the Scan Tab
- Click on New Scan
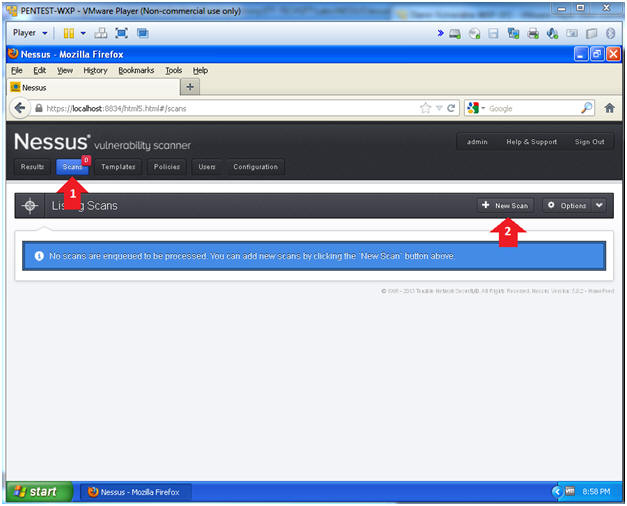
- Instructions:
- Create New Scan
- Instructions:
- Scan Title: Damn Vulnerable WXP-SP2
- Scan Type: Run Now
- Scan Policy: Internal Network Scan
- Scan Target: Input Damn Vulnerable WXP-SP2's IP Address.
- In my case, the IP Address is 192.168.1.116
- Click the Create Scan Button
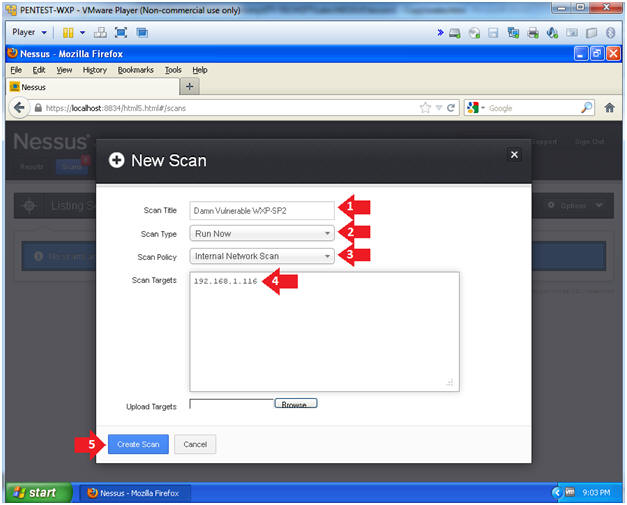
- Instructions:
- Monitor the Scan
- Instructions:
- Click on the Running Status
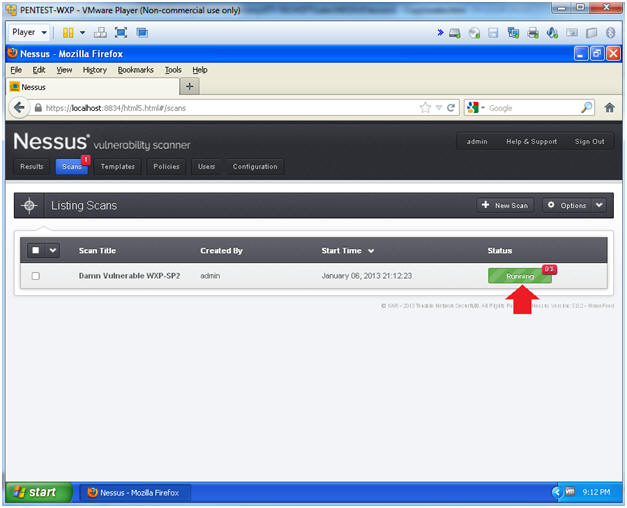
- Instructions:
- Host Result Summary
- Instructions:
- Wait 5 to 10 minutes until scan is 100% complete.
- Click on the purple section to see the most critical vulnerabilities.
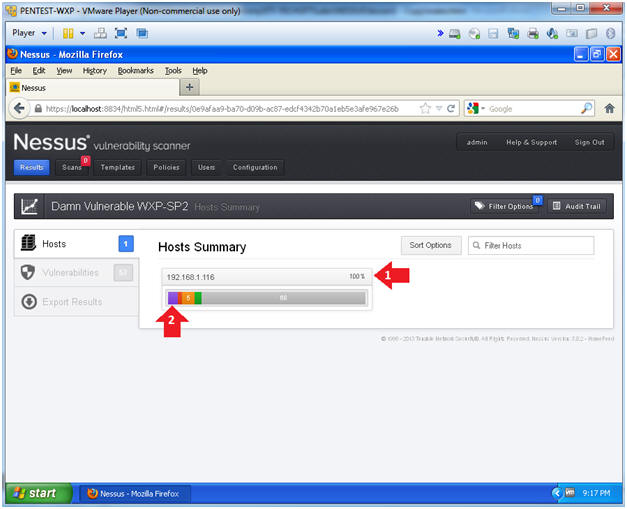
- Instructions:
- View Critical Alert(s)
- Instructions:
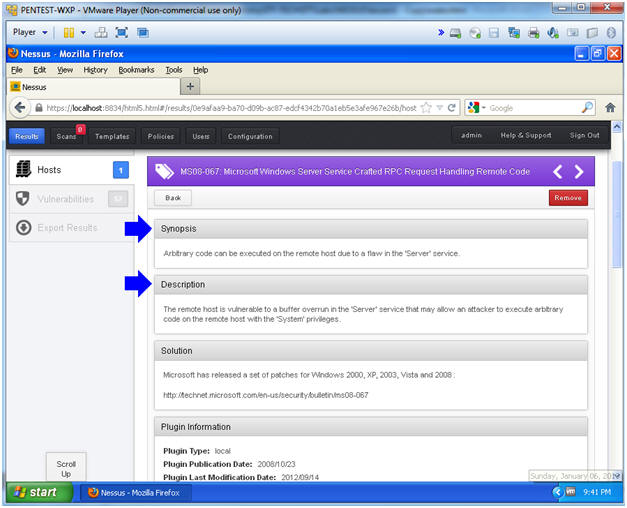
- Click on MS08-067
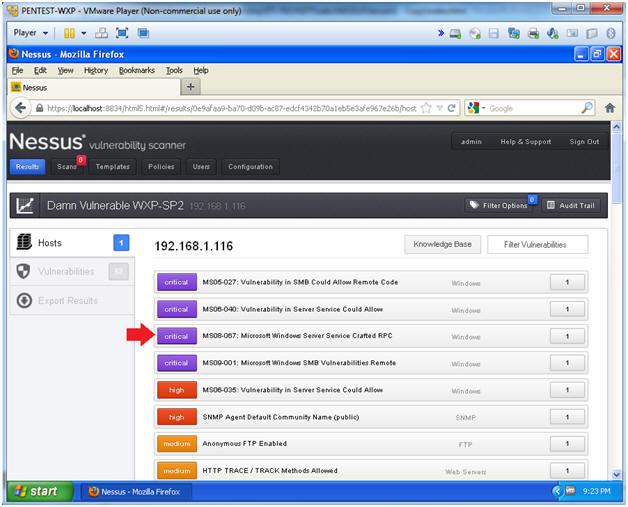
- Instructions:
- Analyzing MS08-067 Results
- Instructions:
- Read the Synopsis
- Read the Description
- Read the Vulnerability Information
- This will show you which tools can be used to exploit this vulnerability.
- Note(FYI):
- Basically the attacker can use a tool like Metasploit to mangle the kernel by overflowing the stack and then execute code after overrunning the kernel.
- Instructions:
- View Critical Alert
- Instructions:
- Export Format: CSV
- Click the Export Button
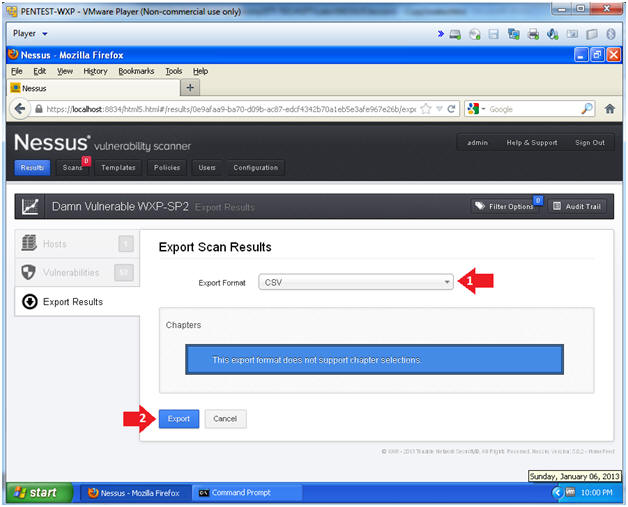
- Instructions:
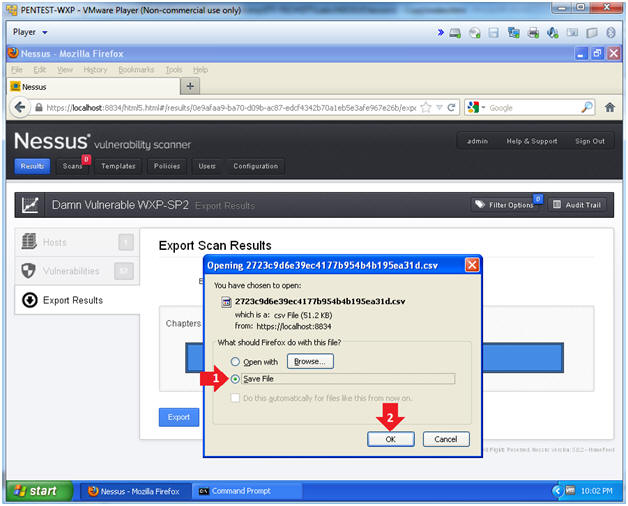
- Download Report
- Instructions:
- Click the radio button "Save File"
- Click the OK button.
- Instructions:
| Section 5: Proof of Lab |
- Open a Command Prompt
- Instructions:
- Start --> All Programs --> Accessories --> Command Prompt
- Instructions:
- Proof of Lab Instructions
- Instructions:
- cd "My Documents\Downloads"
- type *.csv | findstr MS08-067
- date /t
- echo "Your Name"
- Replace the string "Your Name" with your actual name.
- e.g., echo "John Gray"
- Do a PrtScn
- Paste into a word document
- Upload to website Www.AnToanThongTin.Edu.Vn

- Instructions:
Không có nhận xét nào:
Đăng nhận xét