| Section 0. Background Information |
- BitDefender Rescue CD
- BitDefender Rescue CD is freely provided by BitDefender. BitDefender provides a full suite of security tools. Using the BitDefender Rescue CD, you have the ability to do the following: (1) boot a windows operating system into a Xubuntu environment, (2) mount up the windows filesystem for access, and (3) scan the mounted windows file system for viruses.
- Lab Notes
- In this lab we will do the following:
- Download the BitDefender iso
- Boot Windows 7 VM into the BitDefender Rescue Environment
- Using BitDefender Rescue CD
- Update BitDefender
- Run BitDefender Antivirus Scan
- In this lab we will do the following:
- Prerequisites
- Instructions:
- Windows 7: Lesson 1: Installing Windows 7
- Instructions:
| Section 1. Download BitDefender |
- Open A Firefox Browser
- Notes:
- Login to the machine that has VM Player Installed.
- Instructions:
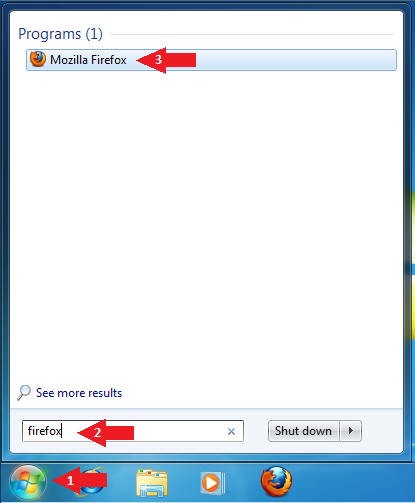
- Click on the Windows Start Button
- Type firefox in the search box
- Click on Mozilla Firefox
- Notes:
- Open A Firefox Browser
- Instructions:
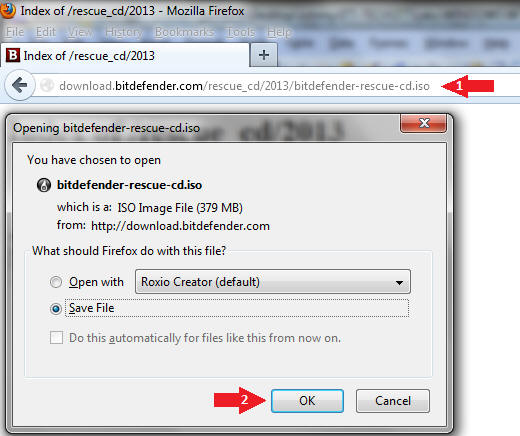
- Place the following address in the Firefox Browser
- Click OK to download
- Instructions:
- Navigate and Save
- Instructions:
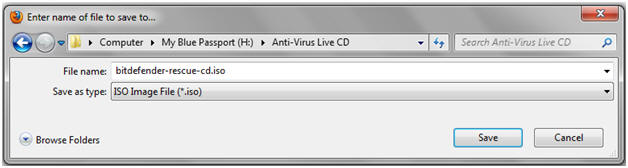
- Navigate to your external USB hard drive.
- Create a directory call Anti-Virus Live CD on your
- Click Save
- Instructions:
| Section 2. Start your Windows 7 VM |
- Edit Virtual Machine Settings
- Instructions:
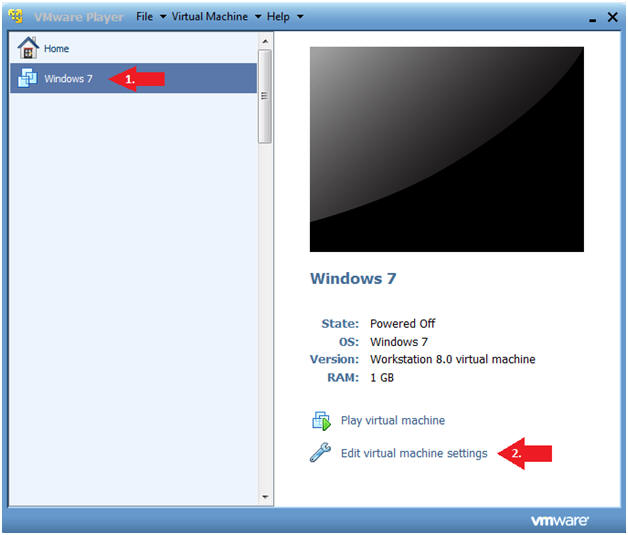
- Click on Windows 7
- Click on Edit virtual machine
- Instructions:
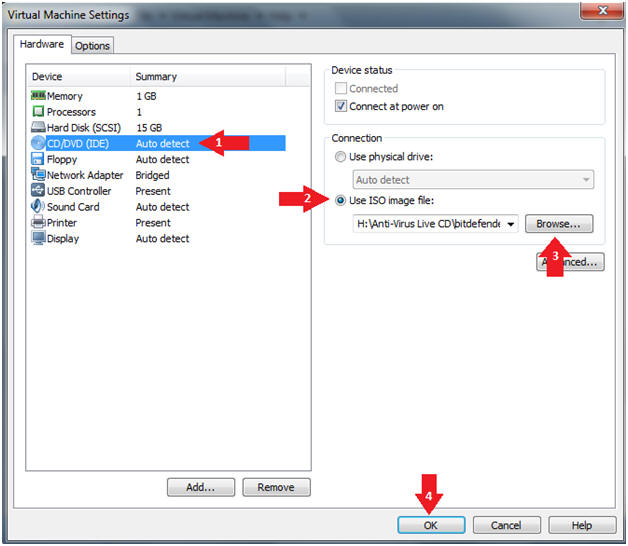
- Configure CD/DVD (IDE)
- Instructions
- Configure CD/DVD (IDE)
- Click the radio button "Use ISO image file:"
- Click the Browse button and Navigate to the location of the bitdefender-rescue-cd.iso
- Click the Okay button
- Instructions
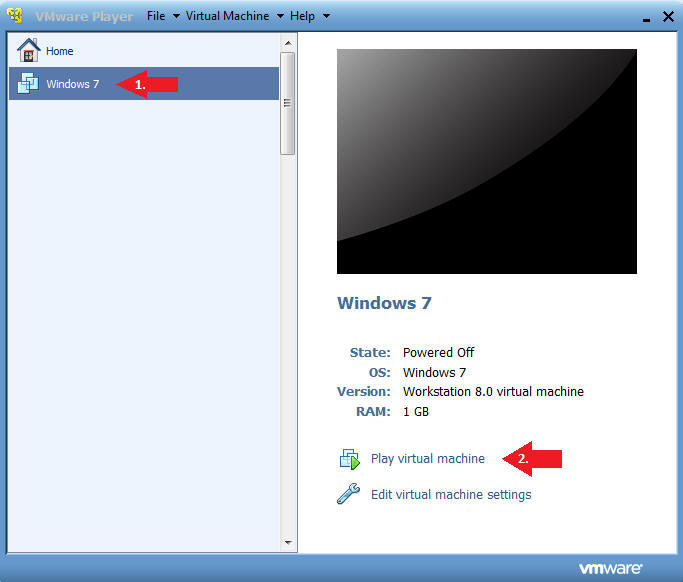
- Start Windows 7
- Instructions:
- Click on Windows 7
- Click on Play virtual machine
- Instructions:
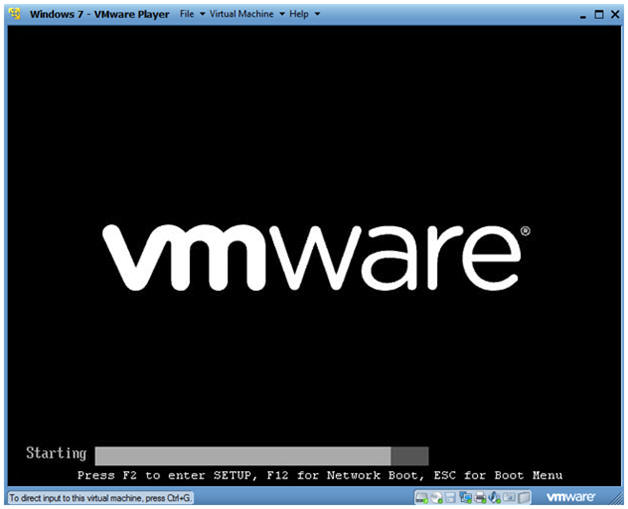
- Access the Boot Menu
- Instructions
- Once you see the below vmware screen, (1) Left Click in the screen and (2) press the <Esc> key.
- Instructions
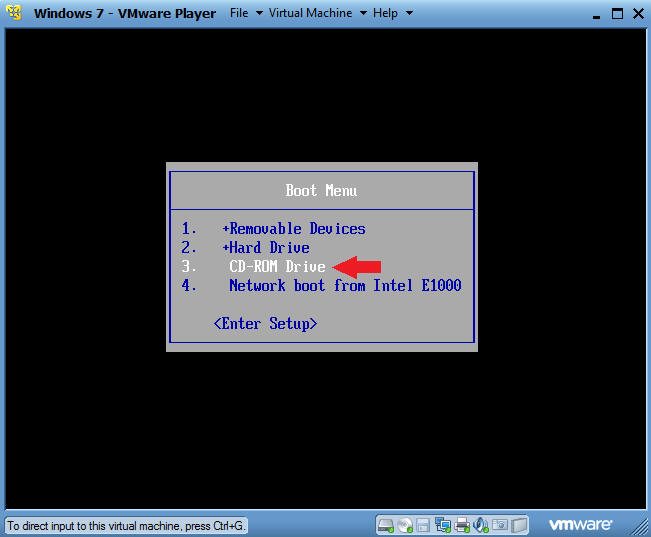
- Boot from CD-ROM Drive
- Instructions
- Arrow Down to where CD-ROM Drive is highlighted
- Press <Enter>
- Instructions
| Section 3. Using Bitdefender Rescue CD |
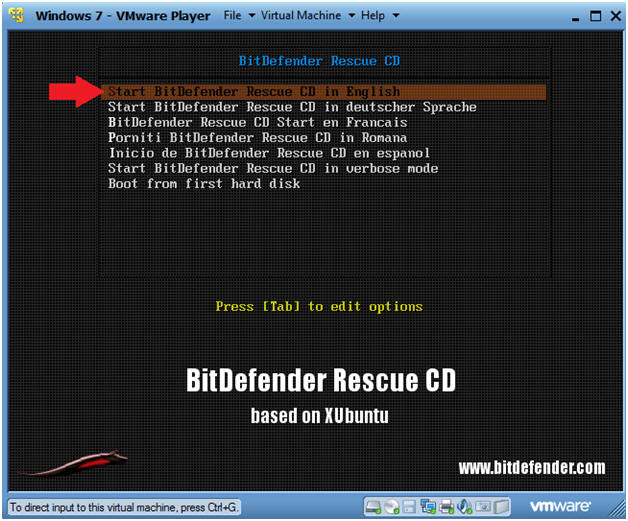
- BitDefender Rescue Menu
- Instructions
- Select Language of Choice, English is default.
- Instructions
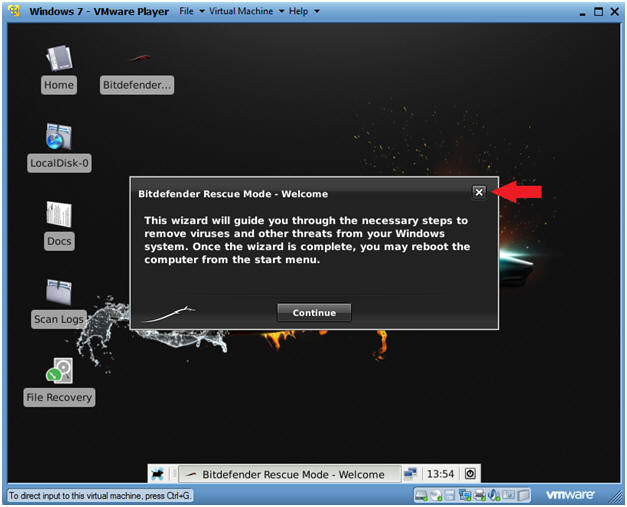
- BitDefender Rescue Mode - Welcome
- Instructions
- Do not click Continue.
- Click the X to close the BitDefender Application for now.
- Instructions
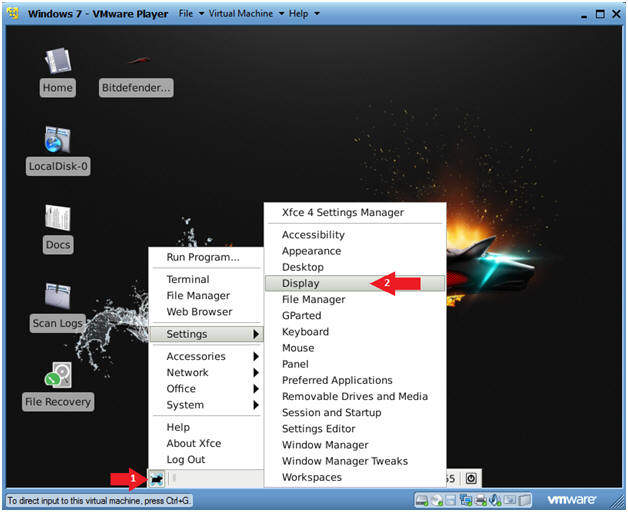
- Open BitDefender Display Settings
- Instructions
- Select the X from the GUI Panel
- Settings --> Display
- Instructions
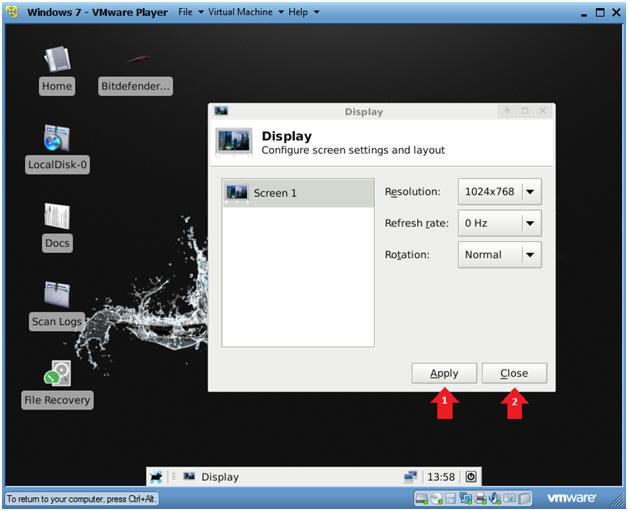
- Select Display
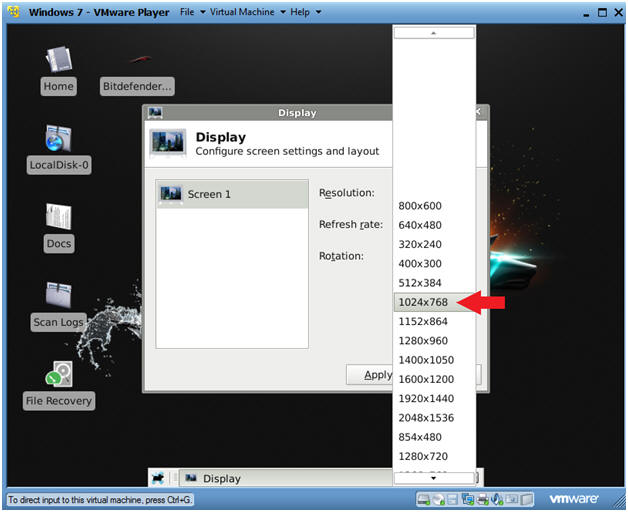
- Instructions
- Select 1024 x 768
- Instructions
- Set Display
- Instructions
- Click Apply
- Click Close
- Instructions
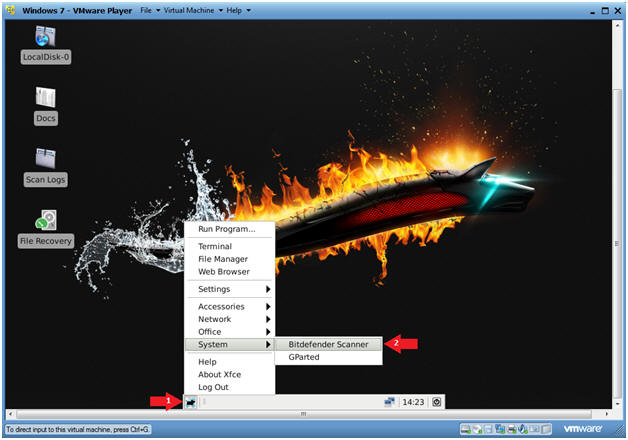
- Start Bitdefender Scanner
- Instructions
- Click the X on the GUI
- System --> Bitdenfender Scanner
- Instructions
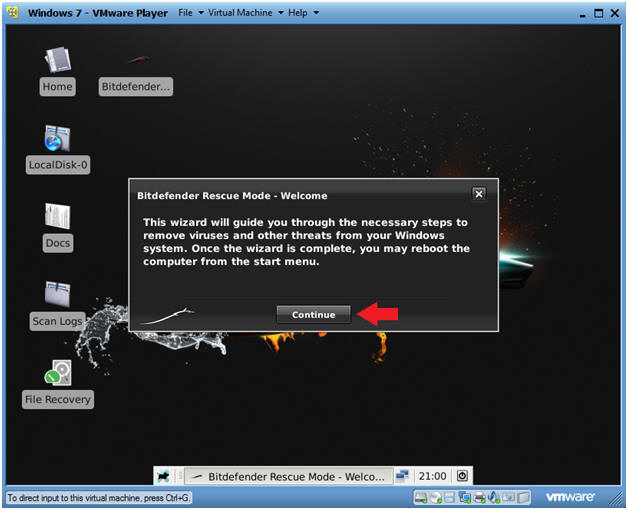
- Bitdenfender Rescue Mode - Welcome
- Instructions
- Click Continue
- Instructions
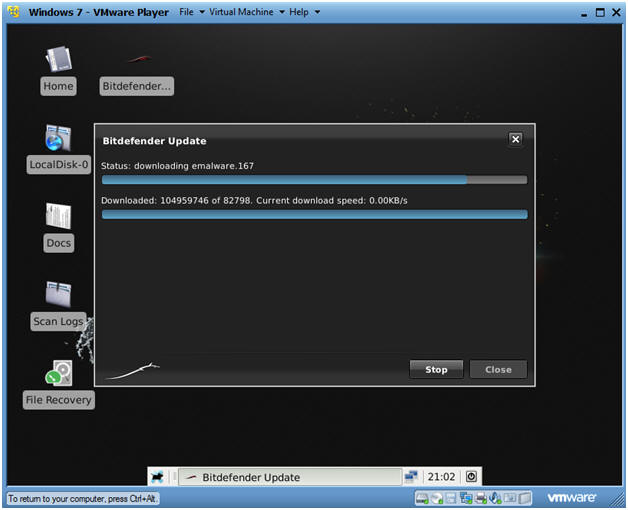
- Bitdenfender Update
- Notes (FYI):
- Bitdefender will now download the latest updates for their scanner.
- This will take around 15 minutes.
- Notes (FYI):
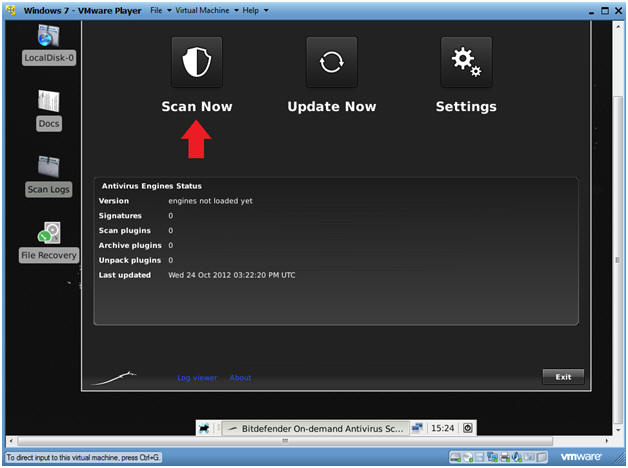
- Scan Now
- Instructions
- Click Scan Now
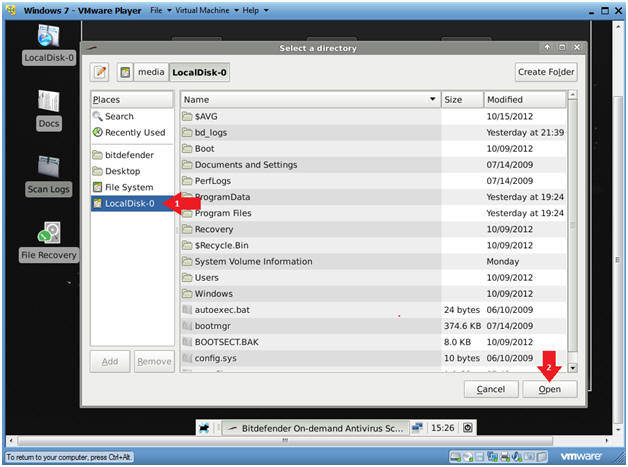
- Instructions
- Start Scan
- Instructions
- Click on LocalDisk-0
- Click Open
- Instructions
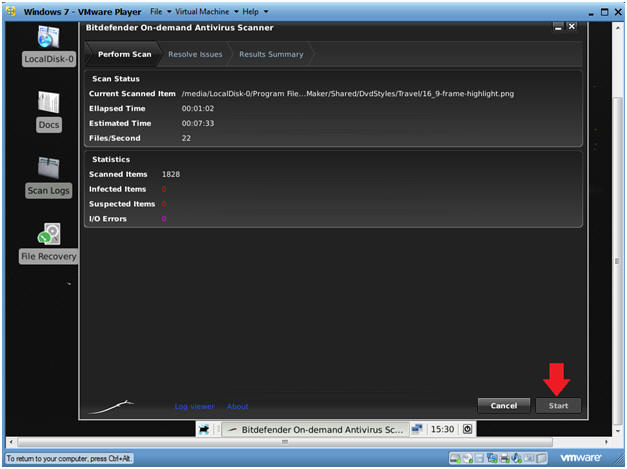
- Bitdenfender Antivirus Scanner
- Notes (FYI):
- Bitdefender will show a loading screen before the scan begins.
- Instructions
- Click Scan
- Notes (FYI):
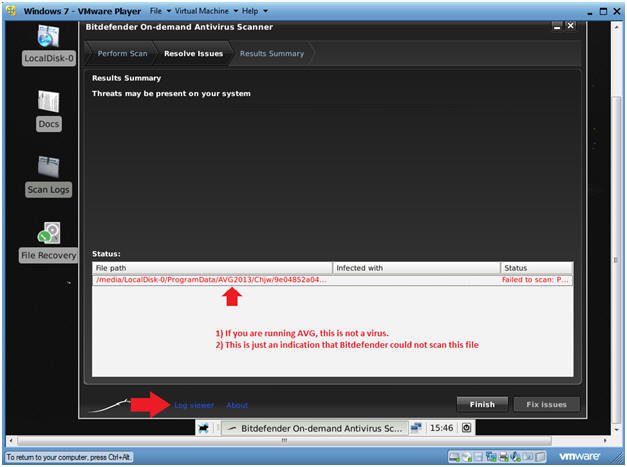
- Viewing Results
- Notes (FYI):
- The white status pain will list any found viruses.
- In my case, Bitdefender identicates that it could not run a scan on an AVG2013 dat file. (No Big Deal)
- Instructions
- Click on the Log viewer
- Continue to Proof of Lab Section (Do not close Log viewer)
- Notes (FYI):
| Section 4. Proof of Lab |
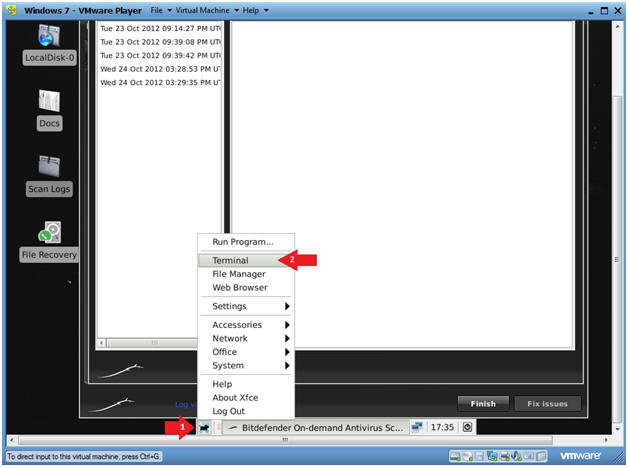
- Open a Terminal
- Notes (FYI):
- The white status pain will list any found viruses.
- In my case, Bitdefender identicates that it could not run a scan on an AVG2013 dat file. (No Big Deal)
- Instructions
- Click on the X on the GUI
- Click on Terminal
- Notes (FYI):
- Proof of Lab Instructions
- Instructions:
- date
- Press <Enter>
- echo "Your Name"
- Replace the string "Your Name" with your actual name.
- e.g., echo "John Gray"
- Do a PrtScn
- Paste into a word document
- Upload to website www.antoanthongtin.edu.vn

- Instructions:
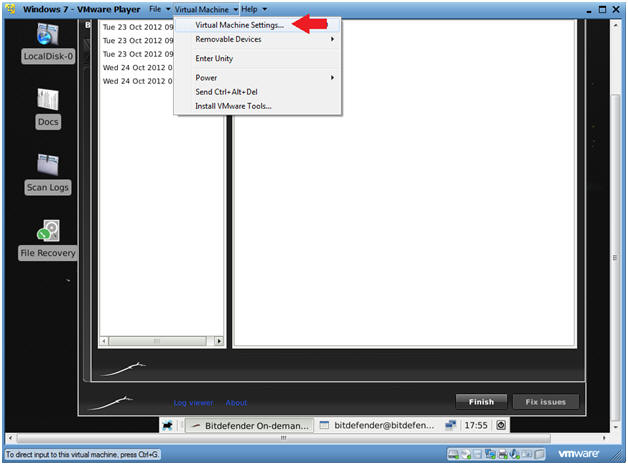
- Edit Virtual Machine Settings
- Instructions:
- From the VM Player Menu Bar do the following:
- Select Virtual Machine
- Select Virtual Machine Settings...
- Instructions:
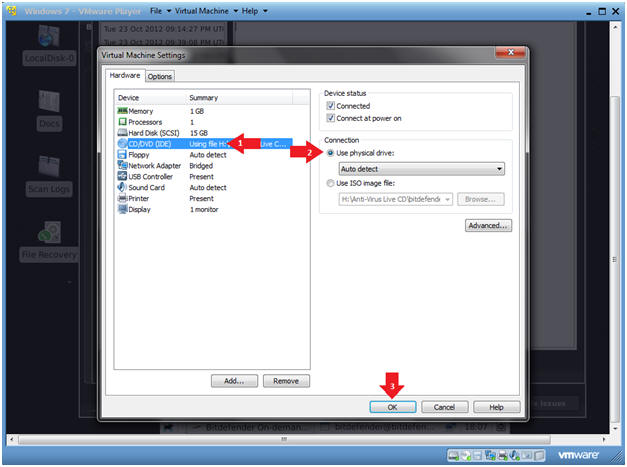
- Edit CD/DVD (IDE)
- Instructions:
- Select CD/DVD (IDE)
- Select the Connection radio button: Use physical drive, with Auto detect selected.
- Click the OK Button
- Instructions:
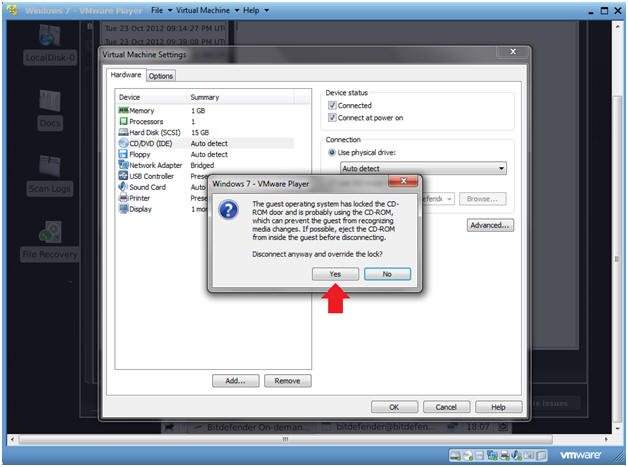
- Windows 7 - VMware Player CD-ROW Disconnect Message
- Instructions:
- Select Yes
- Instructions:
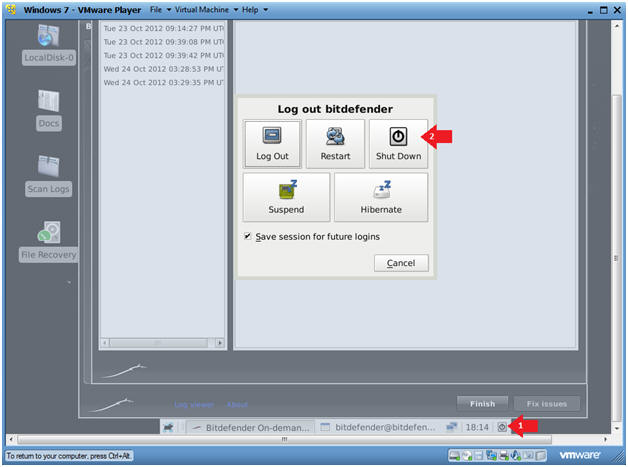
- Shutdown Machine
- Instructions:
- Click the small Shutdown icon on the bottom GUI bar (See Below)
- Click the big Shutdown icon.
- Instructions:
Không có nhận xét nào:
Đăng nhận xét